
【嵌入式】Windows10&树莓派3b+安装Qt-5教程
目标:在PC系统上(windows)和树莓派系统上分别安装和配置Qt5开发环境;在树莓派上完成一个简单的基于Qt的图形窗口应用程序;在前面实验的基础上,在树莓派上完成一个Qt+opencv图像显示,或者Qt+网络聊天的程序(任选其一)。(一)Windows10安装Qt-5教程(1). Qt-5.11.2下载官网下载地址:http://download.qt.io/archiv...
Windows10&树莓派3b+安装Qt-5教程
目标:
- 在PC系统上(windows)和树莓派系统上分别安装和配置Qt5开发环境;
- 在树莓派上完成一个简单的基于Qt的图形窗口应用程序;
- 在前面实验的基础上
3.1 在树莓派上完成一个Qt+opencv图像显示,
3.2 Qt+网络聊天的程序。
(一)安装Qt-5
(1.1)Windows10安装Qt-5教程
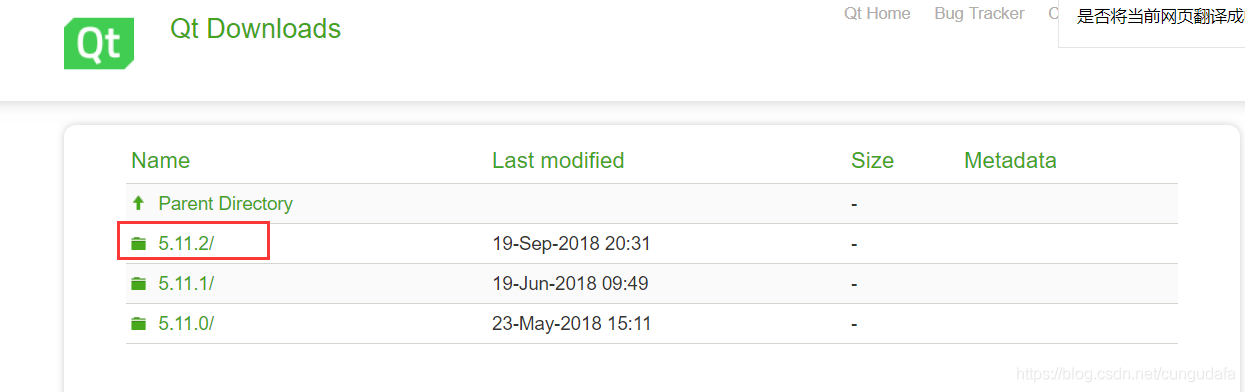
(1). Qt-5.11.2下载
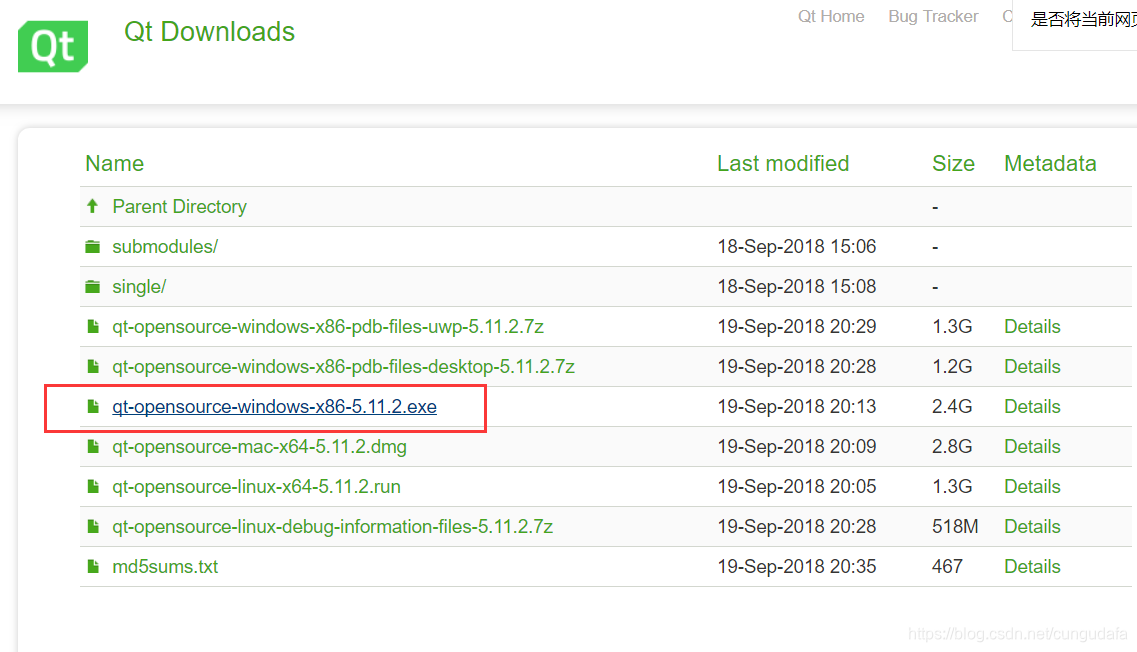
官网下载地址:http://download.qt.io/archive/qt/
选择qt-*.exe文件下载
(2). 配置参考配置链接:VS2017+Qt-5配置
(3).VS2017+Qt-5创建简单ui界面参考链接:VS2017+Qt-5编程
(2.1)树莓派端安装Qt-5教程
(1). 安装
- 更新库文件
- (如果树莓派已是最新版本,也可以略过下面3步,直接下载Qt-5)
sudo apt-get update
sudo apt-get upgrade
sudo rpi-update
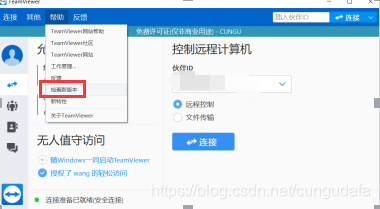
teamviewer会更新到14.0版本出现的问题:
1.当然树莓派的teamviewer不随机启动,我用putty打开远程连接,重置一下开机自启动:
$sudo /etc/init.d/xrdp start
$teamviewer --daemon start
$sudo reboot
重置完一定要重启树莓派!
2.可能会出现teamviewer连接失败问题,把PC端teamviewer更新到相应版本即可!
3.teamviewer版本更新不会更新ID号,因此根据之前的ID就可连接派啦~
- 正式开始安装:
sudo apt-get install qt5-default
- 出错、根据提示修改:
sudo dpkg --configure -a
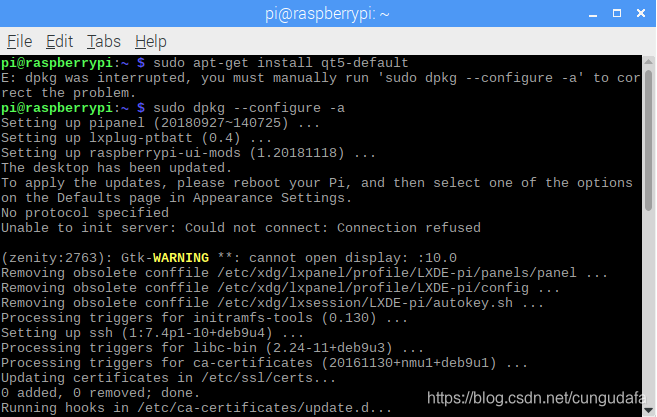
- 一波三折,继续安装:
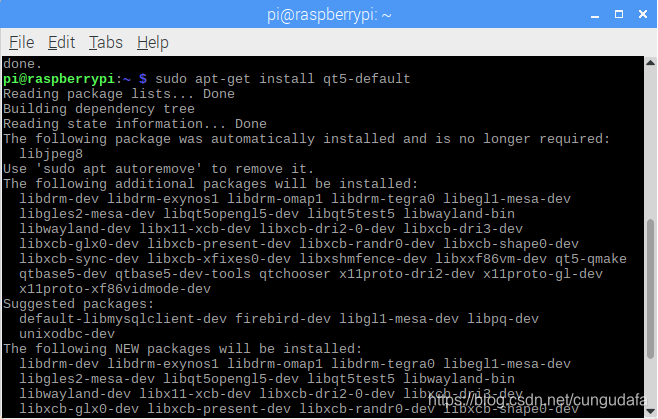
sudo apt-get install qt5-default
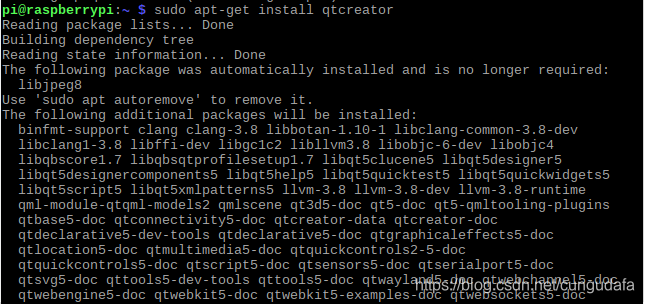
sudo apt-get install qtcreator
(2). 配置
-
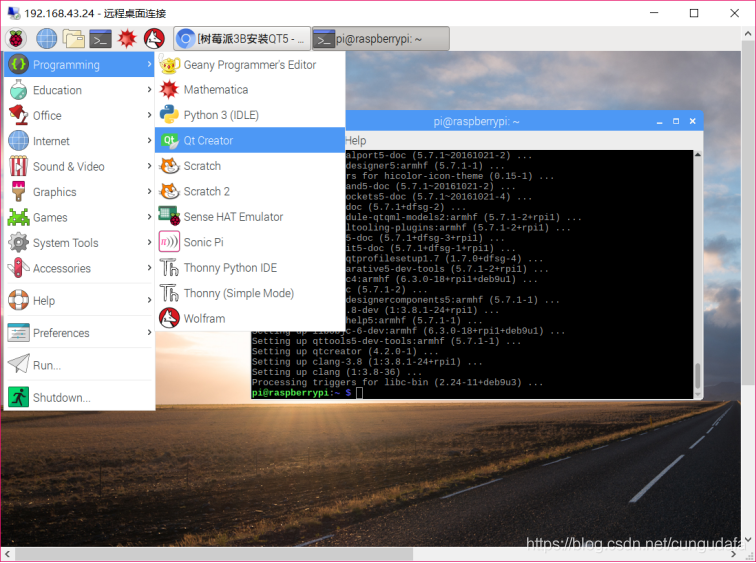
打开Qt-5:
-
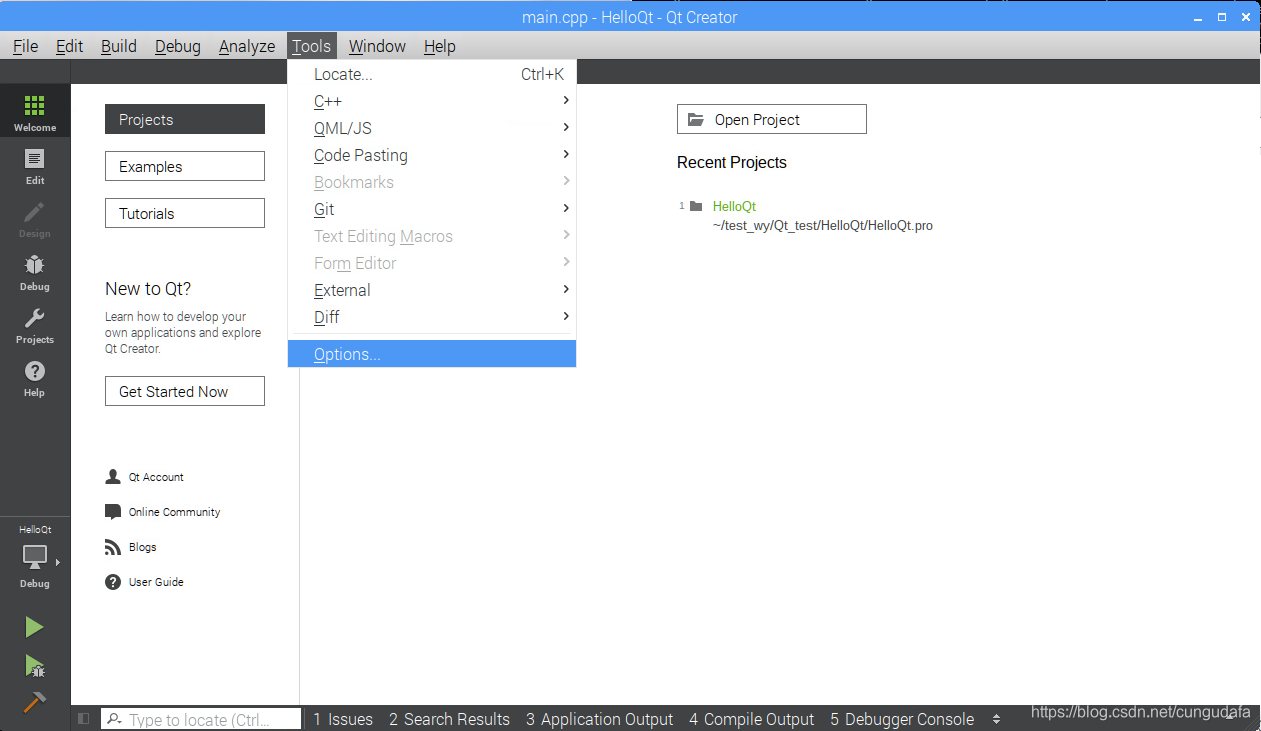
打开Tools->Options
-
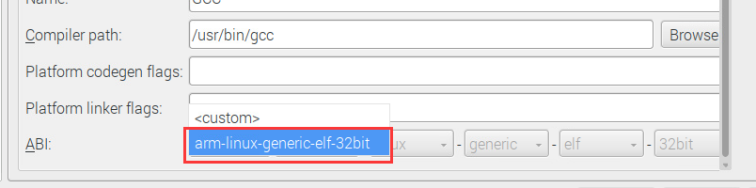
配置Compilers:
- 点击add找到gcc出现如下图框进行配置
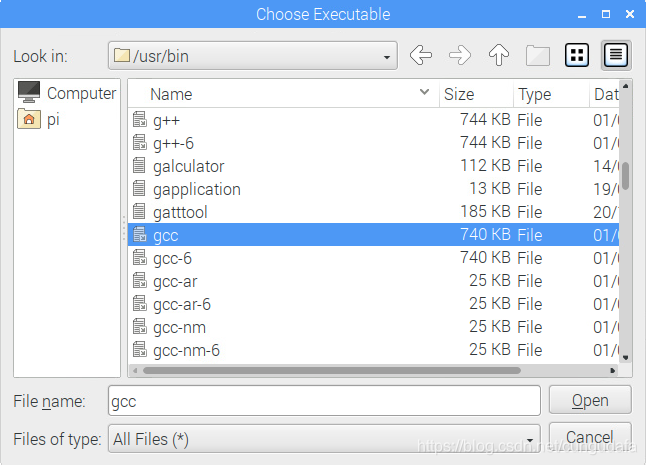
- 点击Browse添加GCC的位置(/usr/bin/gcc)
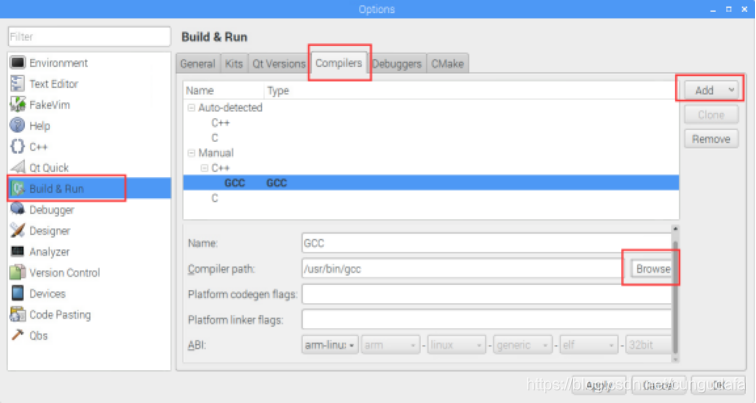
- ABI选择arm-linux-generic-elf-32bit:
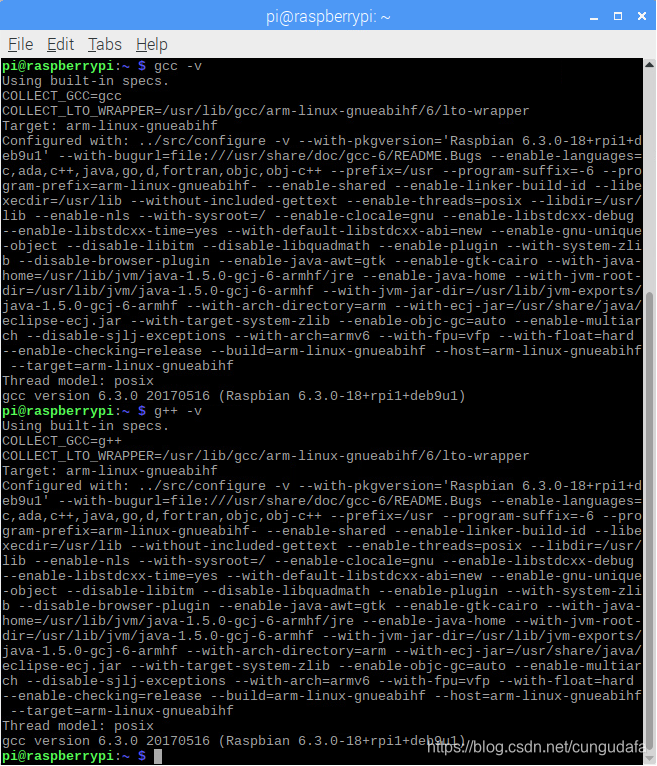
- 测试GCC和G++是否安装成功:
gcc -v
g++ -v
(如果未安装GCC和G++,百度教程安装~)
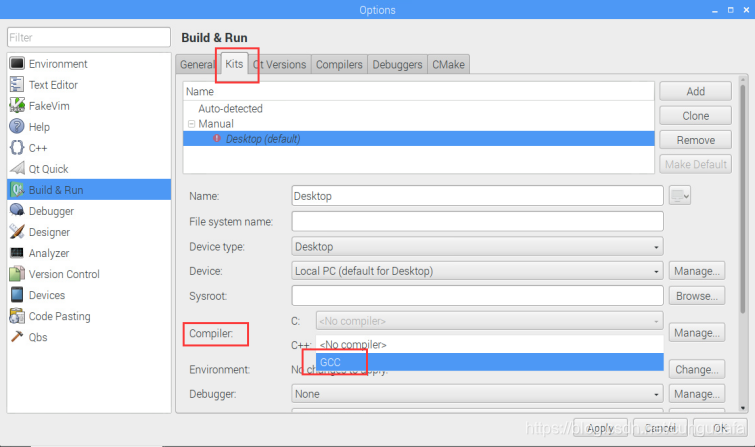
- 配置Kits:
- 找到其中的Compiler,这里也要选择GCC找到其中的Compiler,这里也要选择GCC
- 将Debugger设为System GDB at/usr/bin/gdb:
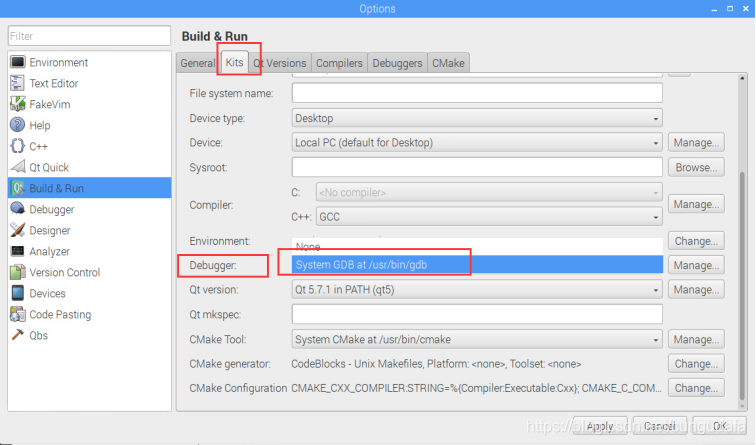
配置完成: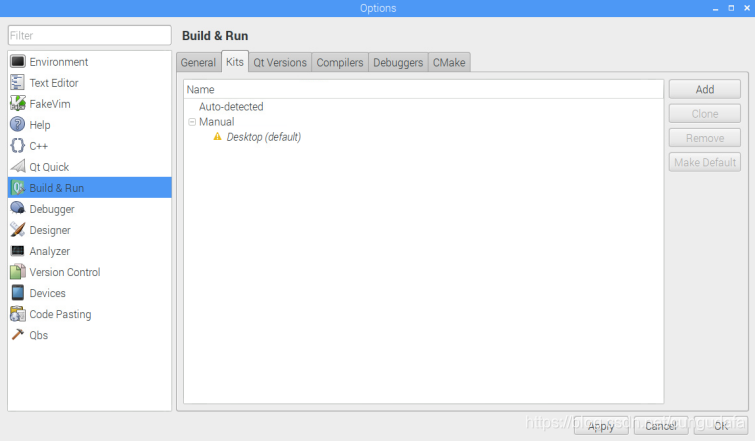
(二)在树莓派上完成一个简单的基于Qt的图形窗口应用程序
- 新建Project:
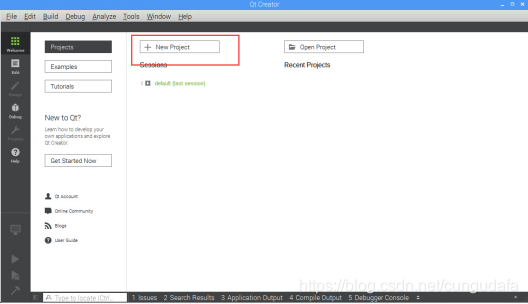
- 新建Qt窗体应用程序:

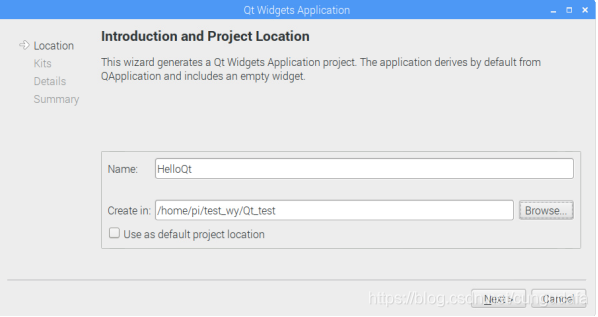
- 一直next下去:
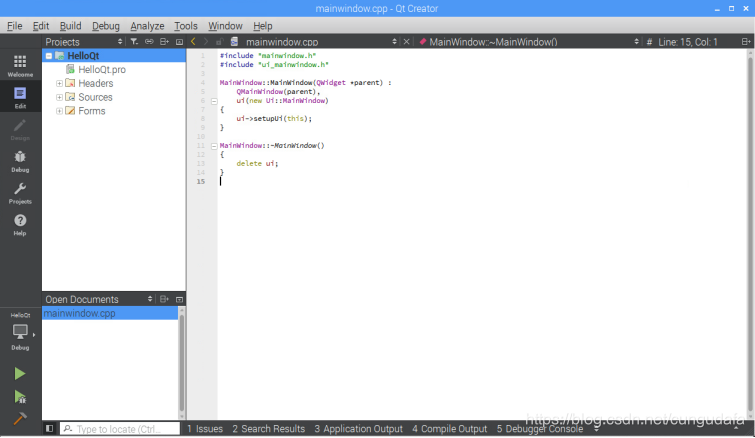
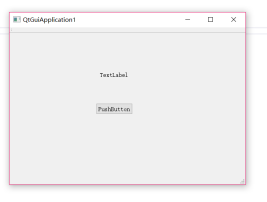
- 点击HelloQt目录下Forms进行可视化界面设置:
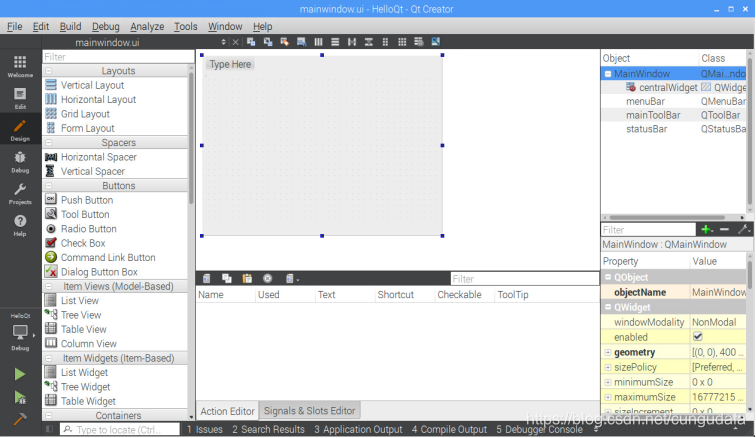
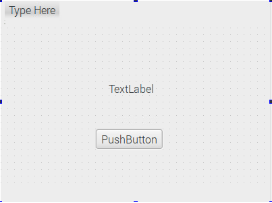
- 添加一个Label和Push Button;在Button上右键选择go to slot:
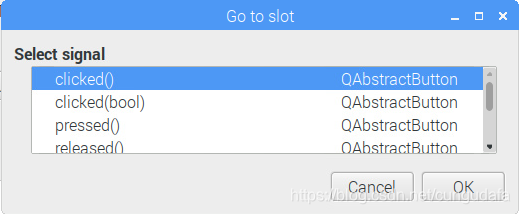
- 选择Clicked()信号槽(即事件):
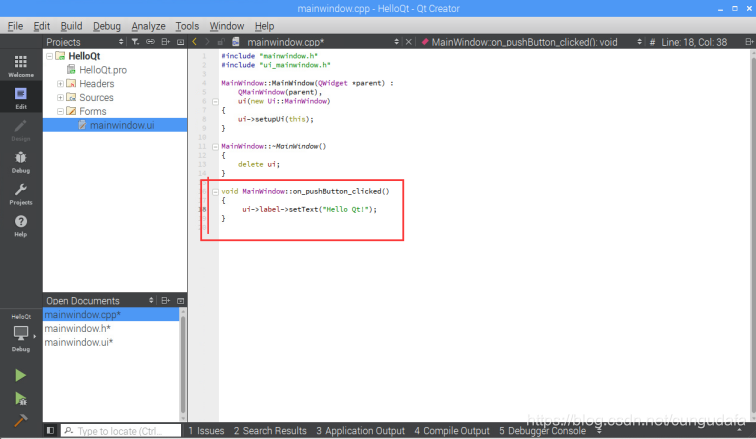
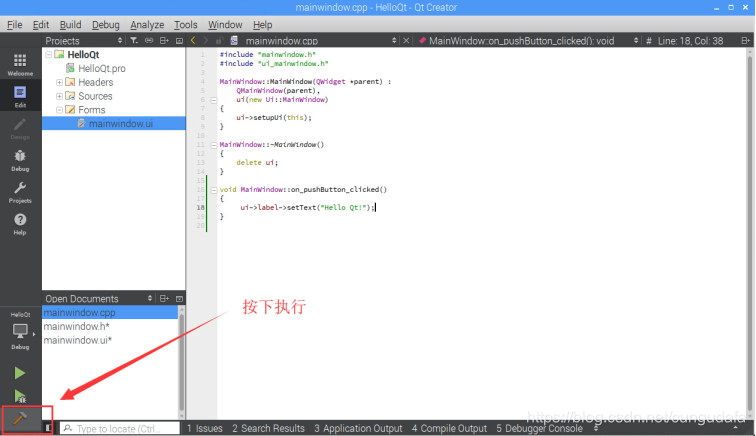
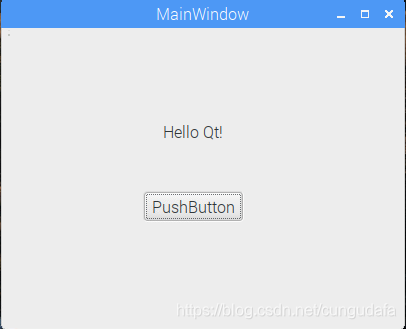
- 在on_pushButton_clicked()事件执行函数中添加改变label文字的语句:
void HelloQt::on_pushButton_clicked()
{
    ui->label->setText("Hello Qt!");
}
- 运行:
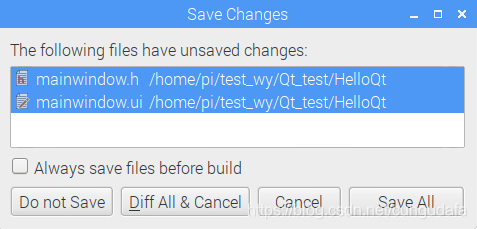
- 提示Save All:
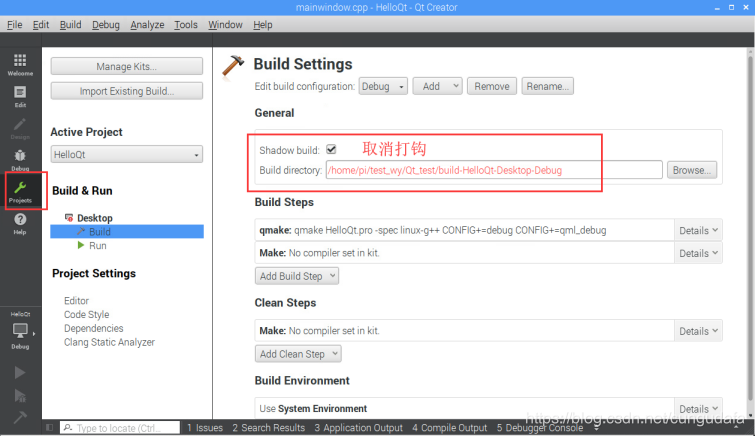
- 遇见问题:

- 运行程序:
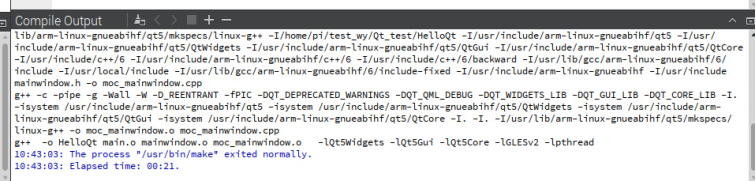
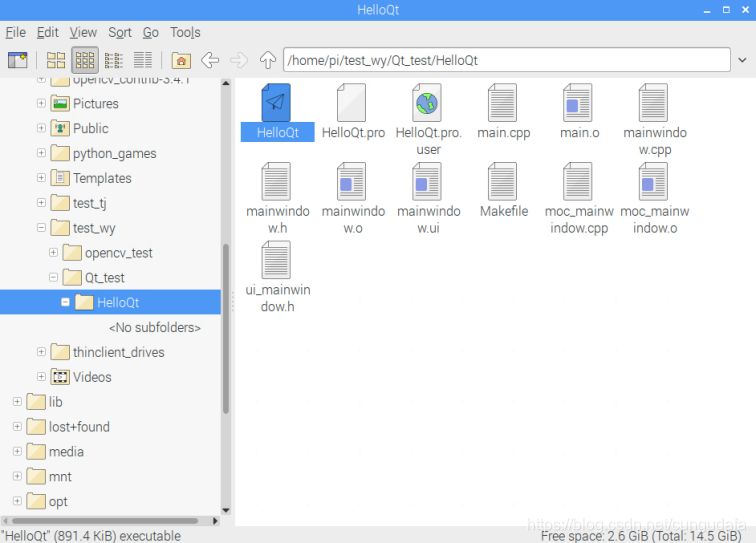
- 直接运行HelloQt:
(三) 在前面实验的基础上,在树莓派上完成一个Qt+opencv图像显示,或者Qt+网络聊天的程序。
(3.1) Qt+opencv图像显示
参考教程:Qt打开文件显示图片
(该博主有给5个详细Qt基于opencv处理图片的详细教程,博文链接)
(3.1.1)Qt+OpenCV构建二维图像处理界面环境:树莓派3b+、 opencv-3.4.1、 Qt-5
目标:从菜单栏打开系统文件目录、选择图片显示、保存
-
新建Qt窗体应用程序:
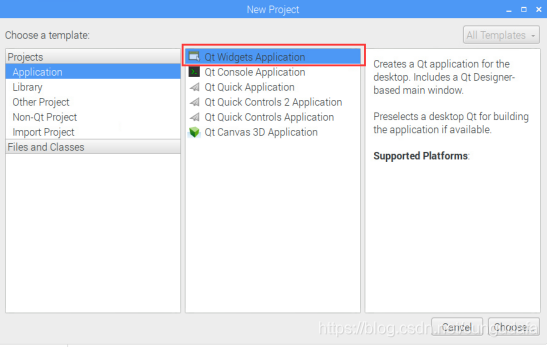
-
命名项目为ImageProcessSystem:
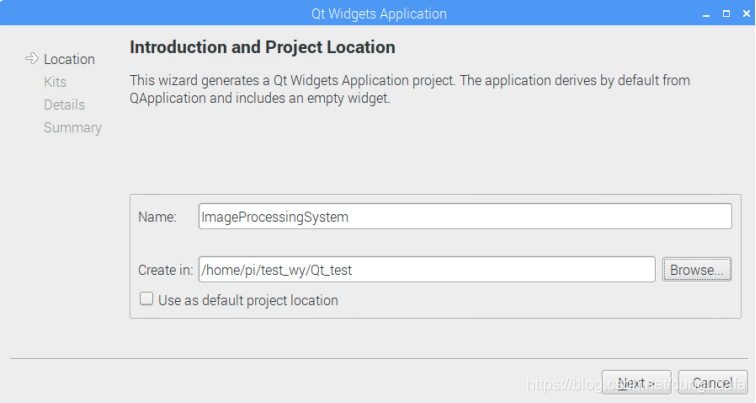
-
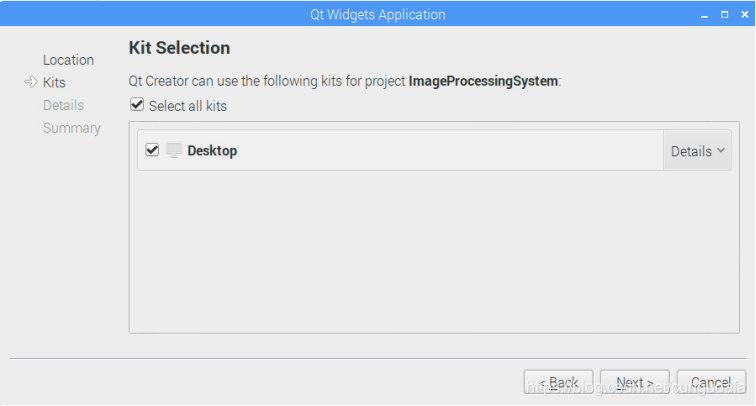
没做任何更改,next:
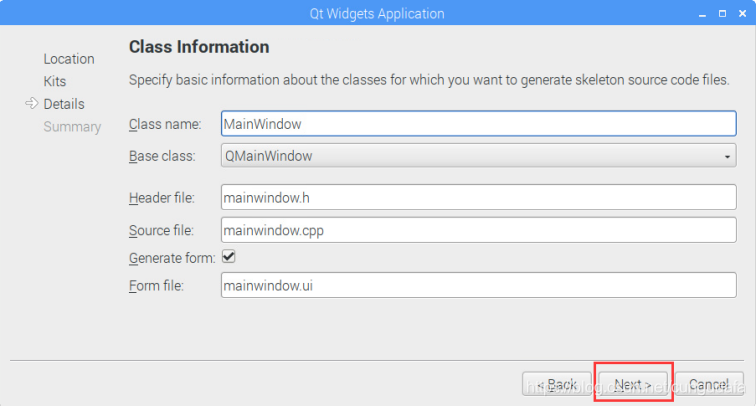
-
创建完成:
-
自定义Mat2QImage函数,用于显示文件查找页面和图片显示页面,具体代码见源码
-
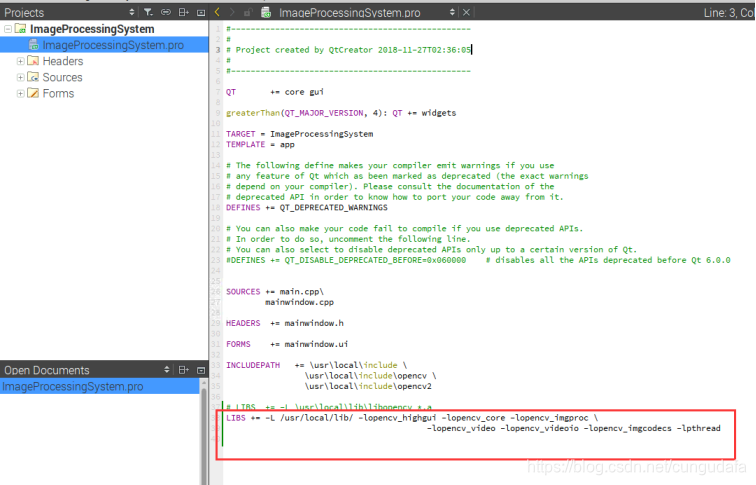
配置 .pro文件,配置opencv库:
#参考路径:
INCLUDEPATH += \home\pi\opencv-3.4.1\include \
\home\pi\opencv-3.4.1\include\opencv \
\home\pi\opencv-3.4.1\include\opencv2
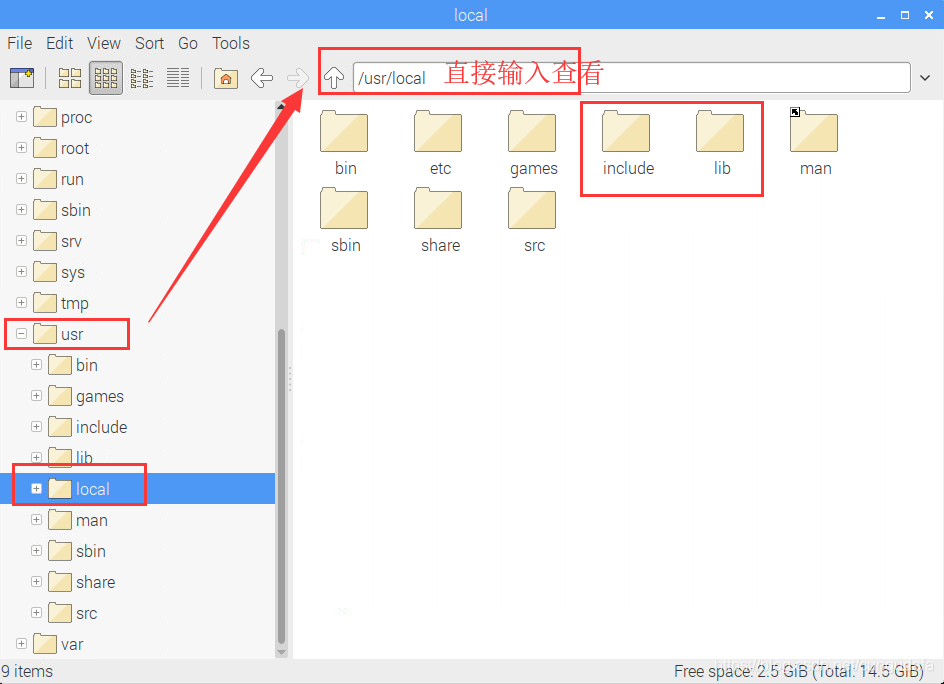
LIBS += -L /usr/local/lib/ -lopencv_highgui -lopencv_core -lopencv_imgproc \
-lopencv_video -lopencv_videoio -lopencv_imgcodecs -lpthread
LIBS位置非常重要,一般调试出错都是LIBS配置出错!
是在/usr/local/lib中的地址,不是你安装opencv的路径下,切记切记!!!!
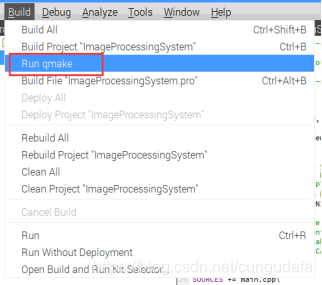
- qmake一下:
- 创建ui
从Widget Box中拖一个graphicsView到窗体中,用于图片展示: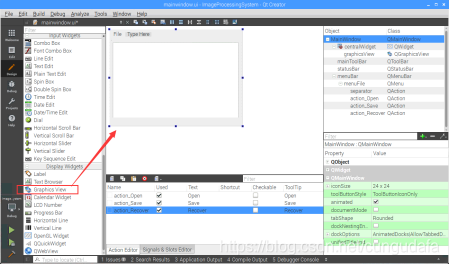
双击Type Here输入File->点击回车->保存为菜单栏第一项:
双击File下的TypeHere->输入Open->回车->保存为子目录Open;重复创建子目录Save、Recover: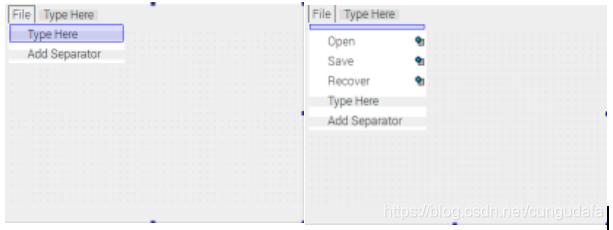
双击窗体下方可修改对象的Name,Text等: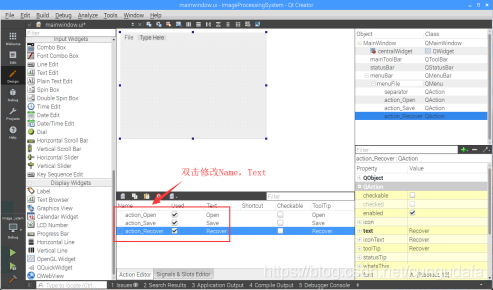
- 在下方控件name处的action_Open:右键选择go to slot->选择triggered()进入代码编辑:
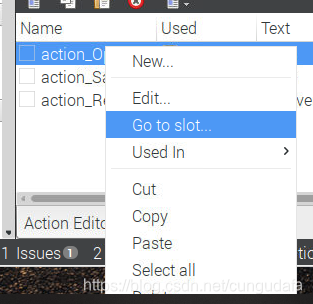
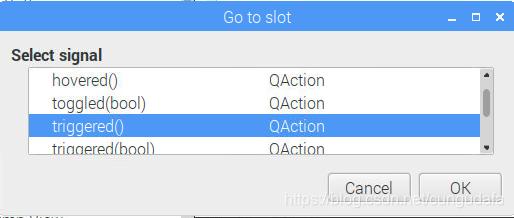
双击triggered()后会创建如下函数,添加一个openfile的源码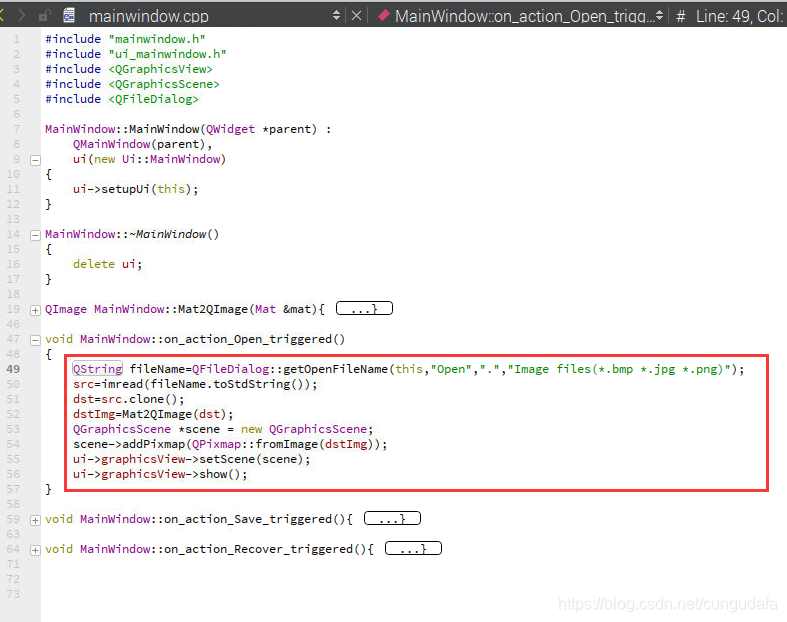
重复上面步骤添加action_Save&&action_Recover的triggered()函数,具体代码见源码
#-------------------------------------------------
#
# Project created by QtCreator 2018-11-27T02:36:05
#
#-------------------------------------------------

QT       += core gui

greaterThan(QT_MAJOR_VERSION, 4): QT += widgets

TARGET = ImageProcessingSystem
TEMPLATE = app

# The following define makes your compiler emit warnings if you use
# any feature of Qt which as been marked as deprecated (the exact warnings
# depend on your compiler). Please consult the documentation of the
# deprecated API in order to know how to port your code away from it.
DEFINES += QT_DEPRECATED_WARNINGS

# You can also make your code fail to compile if you use deprecated APIs.
# In order to do so, uncomment the following line.
# You can also select to disable deprecated APIs only up to a certain version of Qt.
#DEFINES += QT_DISABLE_DEPRECATED_BEFORE=0x060000    # disables all the APIs deprecated before Qt 6.0.0


SOURCES += main.cpp\
        mainwindow.cpp

HEADERS  += mainwindow.h

FORMS    += mainwindow.ui

INCLUDEPATH   += \usr\local\include \
                \usr\local\include\opencv \
                \usr\local\include\opencv2

LIBS += -L /usr/local/lib/ -lopencv_highgui -lopencv_core -lopencv_imgproc \
                          -lopencv_video -lopencv_videoio -lopencv_imgcodecs -lpthread
mainwindow.h
#ifndef MAINWINDOW_H
#define MAINWINDOW_H

#include <QMainWindow>
#include <QImage>
#include <opencv2/opencv.hpp>
using namespace cv;

namespace Ui {
class MainWindow;
}

class MainWindow : public QMainWindow
{
    Q_OBJECT

public:
    explicit MainWindow(QWidget *parent = 0);
    ~MainWindow();
    QImage Mat2QImage(Mat& mat);//

private:
    Ui::MainWindow *ui;

public:
    Mat src,dst;
    QImage dstImg;
private slots:
    void on_action_Open_triggered();
    void on_action_Save_triggered();
    void on_action_Recover_triggered();
};
#endif // MAINWINDOW_H
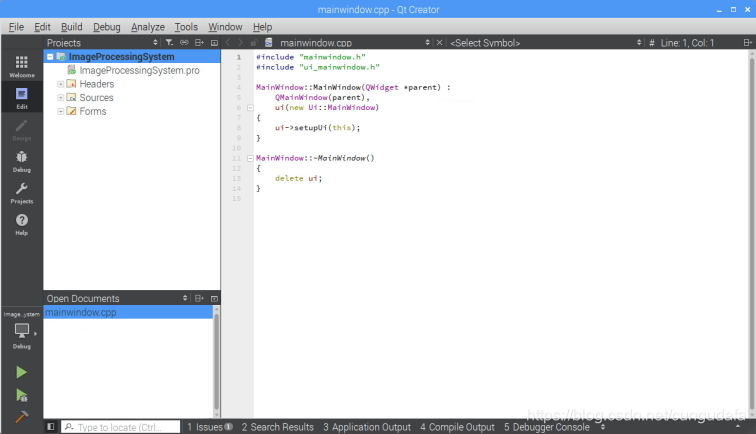
mainwindow.cpp
#include "mainwindow.h"
#include "ui_mainwindow.h"
#include <QGraphicsView>
#include <QGraphicsScene>
#include <QFileDialog>

MainWindow::MainWindow(QWidget *parent) :
    QMainWindow(parent),
    ui(new Ui::MainWindow)
{
    ui->setupUi(this);
}

MainWindow::~MainWindow()
{
    delete ui;
}

QImage MainWindow::Mat2QImage(Mat &mat){
    if(mat.type()==CV_8UC1)
    {
        QImage image(mat.cols,mat.rows,QImage::Format_Indexed8);
        image.setColorCount(256);
        for(int i=0;i<256;i++){
            image.setColor(i,qRgb(i,i,i));
        }
        uchar *pSrc=mat.data;
        for(int row=0;row<mat.rows;row++){
            uchar *pDest=image.scanLine(row);
            memcpy(pDest,pSrc,mat.cols);
            pSrc +=mat.step;
        }
        return image;
    }else if(mat.type()==CV_8UC3){
        const uchar *pSrc=(const uchar*)mat.data;
        QImage image(pSrc,mat.cols,mat.rows,mat.step,QImage::Format_RGB888);
        return image.rgbSwapped();
    }else if(mat.type()==CV_8UC4){
        const uchar *pSrc=(const uchar*)mat.data;
        QImage image(pSrc,mat.cols,mat.rows,mat.step,QImage::Format_ARGB32);
        return image.copy();
    }else{
        return QImage();
    }
}

void MainWindow::on_action_Open_triggered()
{
    QString fileName=QFileDialog::getOpenFileName(this,"Open",".","Image files(*.bmp *.jpg *.png)");
    src=imread(fileName.toStdString());
    dst=src.clone();
    dstImg=Mat2QImage(dst);
    QGraphicsScene *scene = new QGraphicsScene;
    scene->addPixmap(QPixmap::fromImage(dstImg));
    ui->graphicsView->setScene(scene);
    ui->graphicsView->show();
}

void MainWindow::on_action_Save_triggered(){
    QString fileName=QFileDialog::getOpenFileName(this,"Save",".","Image files(*.bmp *.jpg *.png)");
    imwrite(fileName.toStdString(),dst);
}

void MainWindow::on_action_Recover_triggered(){
    dstImg=Mat2QImage(src);
    QGraphicsScene *scene=new QGraphicsScene;
    scene->addPixmap(QPixmap::fromImage(dstImg));
    ui->graphicsView->setScene(scene);
    ui->graphicsView->show();
}
main.cpp
#include "mainwindow.h"
#include <QApplication>

int main(int argc, char *argv[])
{
    QApplication a(argc, argv);
    MainWindow w;
    w.show();

    return a.exec();
}
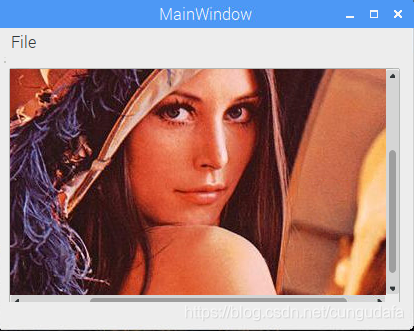
- 运行程序:
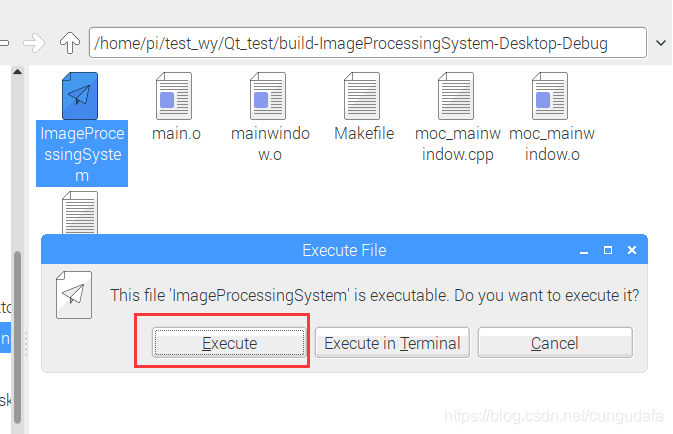
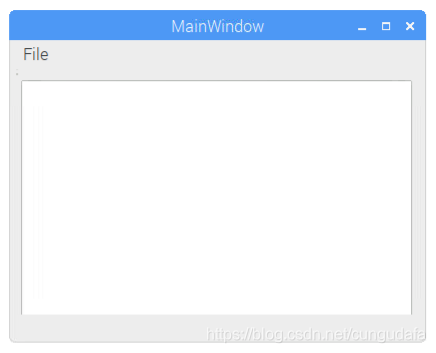
点击File下拉目录Open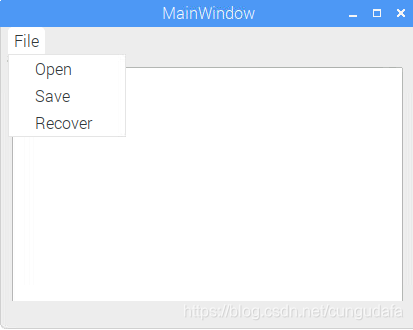
选择一张图片展示: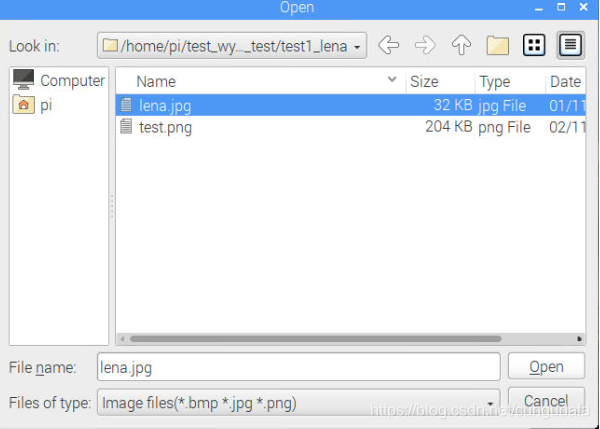
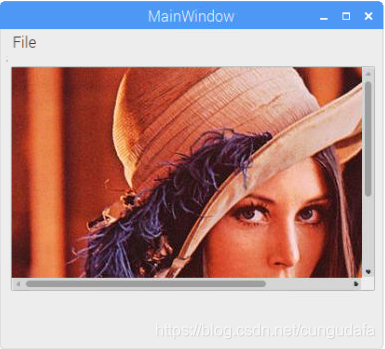
大功告成!还可以对图片进行opencv库的高级操作,教程链接点这儿~
(3.2) Qt+网络聊天的程序
参考教程:Qt-基于TCP聊天室
聊天室分为server端和client端,
server端:
- 监听所有client端,登录提示登录用户的ID;
- 输入端口号,可查看该端口用户对话。
client端:
- 创建个人ID,用于登录和识别;
- 输入服务器地址,登录服务器;
- 多个client端输入相同端口号,可监听消息,达到对话目的。
大致界面设计如下: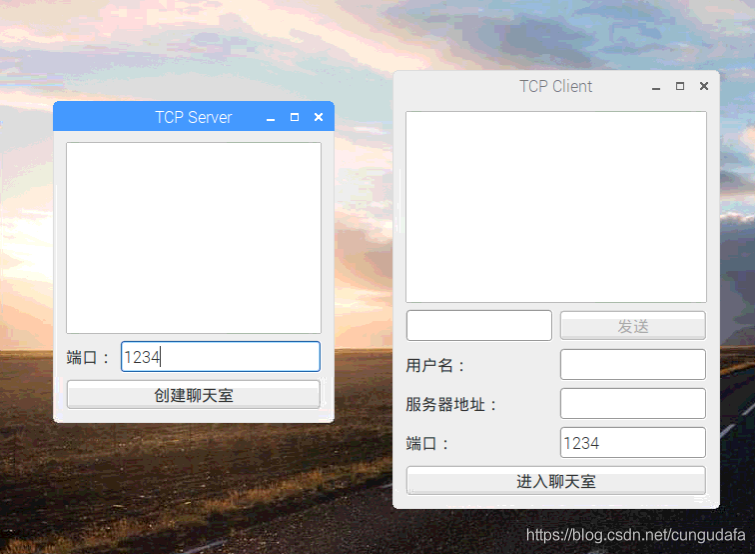
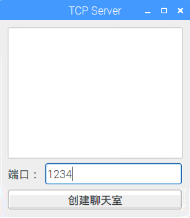
(3.2.1)server端Qt界面设计
(a)创建项目
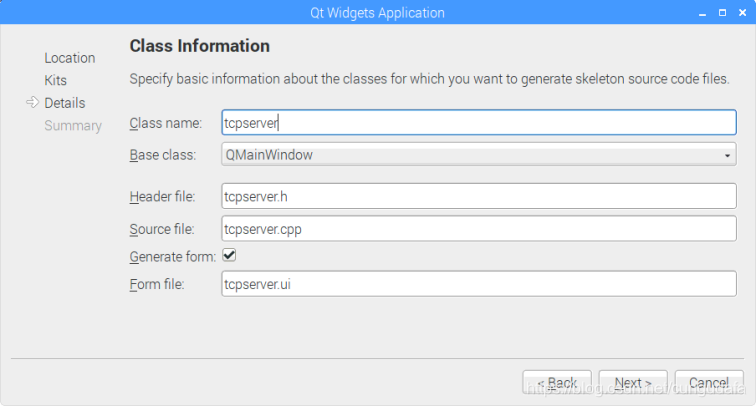
- 树莓派3b+ Qt-5新建Qt窗体应用程序,命名为chat_test


- 命名tcpserver:
- 在项目chat_test右键、分别新建tcpclientsocket.h和tcpclientsocket.cpp;dialog.h和dialog.cpp:
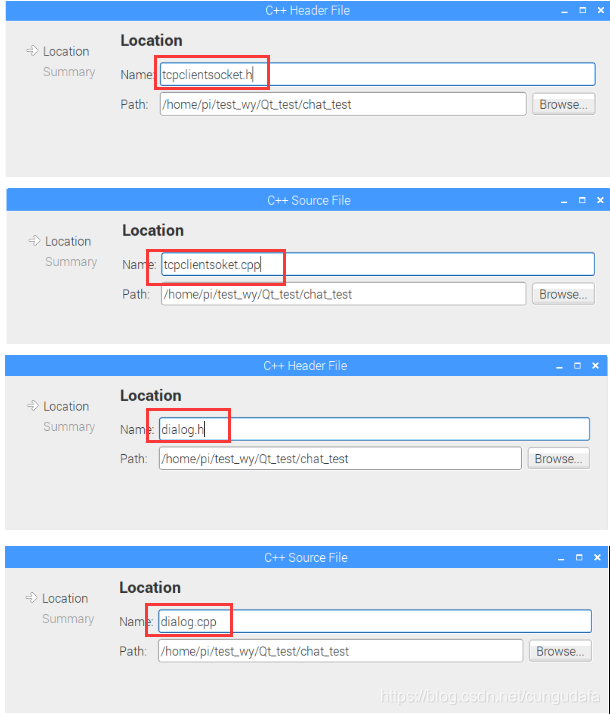
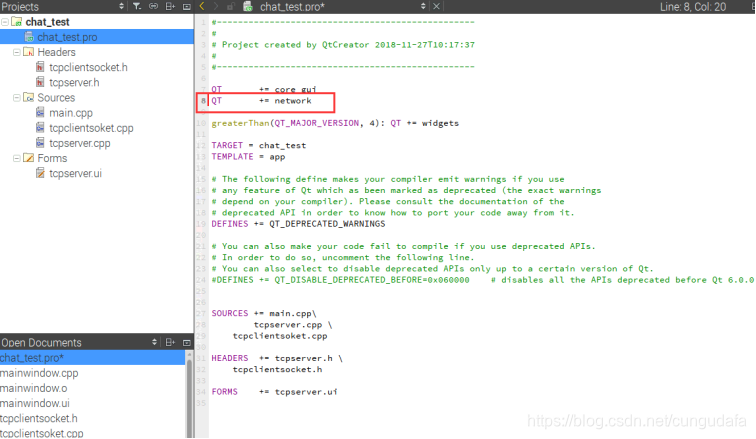
创建完成如下图:
(b)代码扩充
- chat_test.pro:
QT += network
- dialog.h
#ifndef TCPSERVER_H
#define TCPSERVER_H

#include <QDialog>
#include <QListWidget>
#include <QLabel>
#include <QLineEdit>
#include <QPushButton>
#include <QGridLayout>
#include "tcpserver.h"

class TcpServer : public QDialog
{
    Q_OBJECT

public:
    TcpServer(QWidget *parent = 0,Qt::WindowFlags f=0);
    ~TcpServer();
private:
    QListWidget *ContentListWidget;
    QLabel *PortLabel;
    QLineEdit *PortLineEdit;
    QPushButton *CreateBtn;
    QGridLayout *mainLayout;
    int port;
    Server *server;
public slots:
    void slotCreateServer();
    void updateServer(QString,int);  //更新服务器上的信息显示
};

#endif // TCPSERVER_H
- tcpclientsocket.h
#ifndef TCPCLIENTSOCKET_H
#define TCPCLIENTSOCKET_H

#include <QTcpSocket>
#include <QObject>

//用于与客户端通信
class TcpClientSocket : public QTcpSocket
{
    Q_OBJECT
public:
    TcpClientSocket(QObject *parent=0);
signals:
    void updateClients(QString,int);
    void disconnected(int);
protected slots:
    void dataReceived();
    void slotDisconnected();
};

#endif // TCPCLIENTSOCKET_H
- tcpserver.h
#ifndef SERVER_H
#define SERVER_H

#include <QTcpServer>
#include <QObject>
#include "tcpclientsocket.h"

//TCP服务器,监听指定端口的TCP连接
class Server : public QTcpServer
{
    Q_OBJECT
public:
    Server(QObject *parent=0,int port=0);
    QList<TcpClientSocket*> tcpClientSocketList;
signals:
    void updateServer(QString,int);
public slots:
    void updateClients(QString,int);
    void slotDisconnected(int);
protected:
    void incomingConnection(int socketDescriptor);
};

#endif // SERVER_H
- dialog.cpp
#include "dialog.h"

TcpServer::TcpServer(QWidget *parent,Qt::WindowFlags f)
    : QDialog(parent,f)
{
    setWindowTitle(tr("TCP Server"));

    ContentListWidget = new QListWidget;

    PortLabel = new QLabel(tr("端口:"));
    PortLineEdit = new QLineEdit;

    CreateBtn = new QPushButton(tr("创建聊天室"));

    mainLayout = new QGridLayout(this);
    mainLayout->addWidget(ContentListWidget,0,0,1,2);
    mainLayout->addWidget(PortLabel,1,0);
    mainLayout->addWidget(PortLineEdit,1,1);
    mainLayout->addWidget(CreateBtn,2,0,1,2);

    port=1234;
    PortLineEdit->setText(QString::number(port));

    connect(CreateBtn, SIGNAL(clicked()), this, SLOT(slotCreateServer()));
}

TcpServer::~TcpServer()
{

}

void TcpServer::slotCreateServer()
{
    server = new Server(this, port);
    connect(server, SIGNAL(updateServer(QString, int)), this, SLOT(updateServer(QString, int)));

    CreateBtn->setEnabled(false);
}

void TcpServer::updateServer(QString msg, int length)
{
    ContentListWidget->addItem(msg.left(length));
}
- tcpclientsocket.cpp
#include "tcpclientsocket.h"

TcpClientSocket::TcpClientSocket(QObject *parent)
{
                    connect(this,SIGNAL(readyRead()),this,SLOT(dataReceived()));
    connect(this,SIGNAL(disconnected()),this,SLOT(slotDisconnected()));
}

void TcpClientSocket::dataReceived()
{
    while(bytesAvailable()>0)
    {
        int length = bytesAvailable();
        char buf[1024];
        read(buf,length);

        QString msg=buf;
        emit updateClients(msg, length);
    }
}

void TcpClientSocket::slotDisconnected()
{
    emit disconnected(this->socketDescriptor());
}
- tcpserver.cpp
#include "tcpserver.h"

Server::Server(QObject *parent,int port)
    :QTcpServer(parent)
{
    listen(QHostAddress::Any,port);
}

//出现一个新的连接时触发
void Server::incomingConnection(int socketDescriptor)
{
    TcpClientSocket *tcpClientSocket = new TcpClientSocket(this);
    connect(tcpClientSocket, SIGNAL(updateClients(QString,int)), this, SLOT(updateClients(QString,int)));
    connect(tcpClientSocket, SIGNAL(disconnected(int)), this, SLOT(slotDisconnected(int)));

    tcpClientSocket->setSocketDescriptor(socketDescriptor);

    tcpClientSocketList.append(tcpClientSocket);
}

//将任意客户端发来的信息进行广播
void Server::updateClients(QString msg,int length)
{
    emit updateServer(msg,length);
    for(int i=0; i<tcpClientSocketList.count(); i++)
    {
        QTcpSocket *item = tcpClientSocketList.at(i);
        if(item->write(msg.toLatin1(),length) != length)
        {
            continue;
        }
    }
}

//将断开连接的TcpSocket对象删除
void Server::slotDisconnected(int descriptor)
{
    for(int i=0;i<tcpClientSocketList.count();i++)
    {
        QTcpSocket *item = tcpClientSocketList.at(i);
        if(item->socketDescriptor()==descriptor)
        {
            tcpClientSocketList.removeAt(i);
            return;
        }
    }
    return;
}
- main.cpp
#include "tcpclientsocket.h"
#include "tcpserver.h"
#include "dialog.h"
#include <QApplication>

int main(int argc, char *argv[])
{
    QApplication a(argc, argv);
    TcpServer w;
    w.show();
    return a.exec();
}
( c ) 调试代码
运行加载比较慢,请耐心等待:

运行后,chat_test项目同目录下生成build-chat_test-Deskto-Debug文件夹: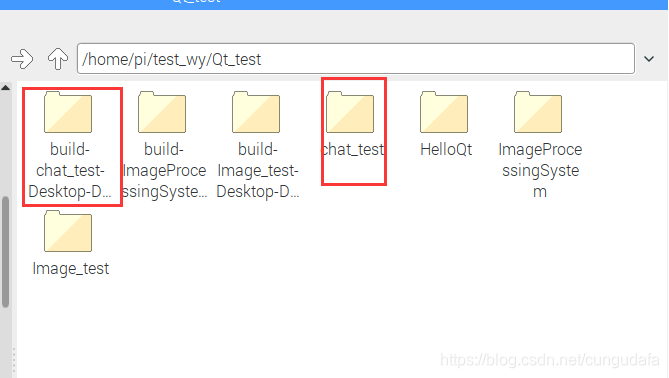
进入文件夹,点击chat_test可执行文件: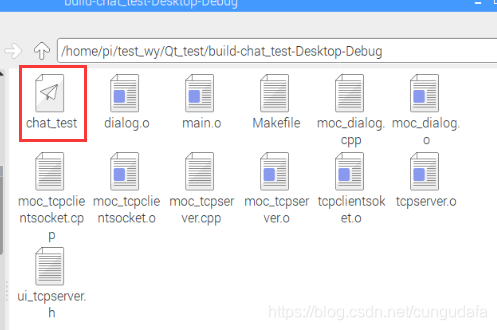
(3.2.2)server端Qt界面设计
(a)创建项目
- 命名为TcpClient:
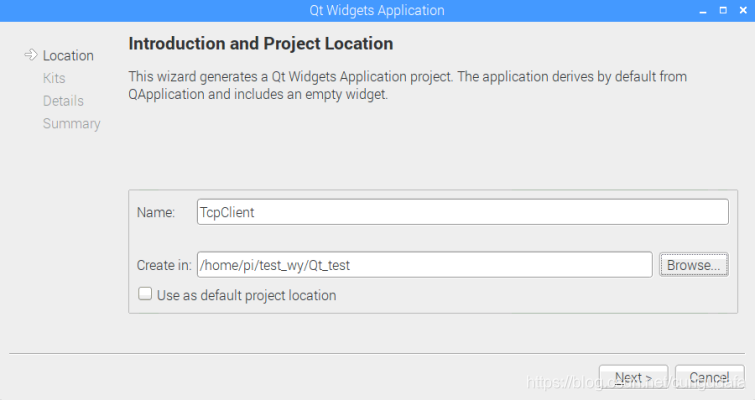
- 命名:
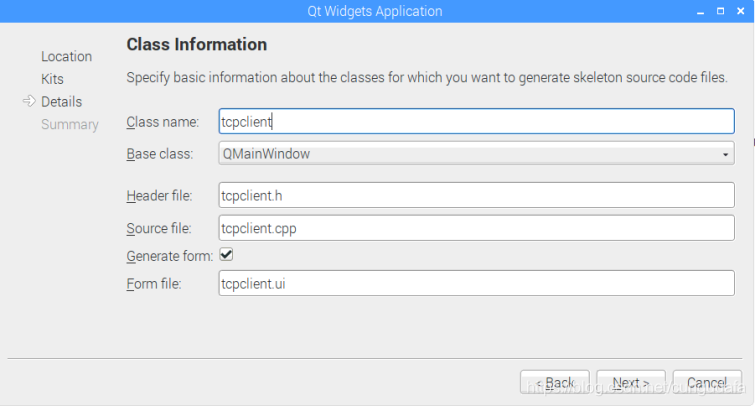
创建完成如下图:
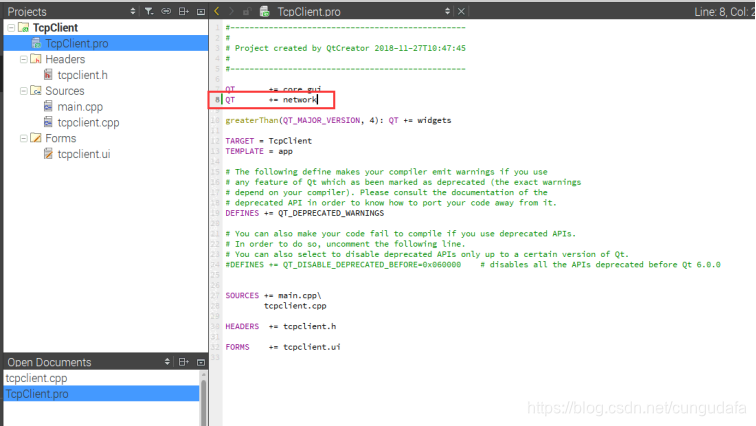
(b)源码
QT += network
- tcpClient.h
#ifndef TCPCLIENT_H
#define TCPCLIENT_H

#include <QDialog>
#include <QListWidget>
#include <QLineEdit>
#include <QPushButton>
#include <QLabel>
#include <QGridLayout>
#include <QHostAddress>
#include <QTcpSocket>

class TcpClient : public QDialog
{
    Q_OBJECT

public:
    TcpClient(QWidget *parent = 0,Qt::WindowFlags f=0);
    ~TcpClient();
private:
    QListWidget *contentListWidget;
    QLineEdit *sendLineEdit;
    QPushButton *sendBtn;
    QLabel *userNameLabel;
    QLineEdit *userNameLineEdit;
    QLabel *serverIPLabel;
    QLineEdit *serverIPLineEdit;
    QLabel *portLabel;
    QLineEdit *portLineEdit;
    QPushButton *enterBtn;
    QGridLayout *mainLayout;
    bool status;
    int port;
    QHostAddress *serverIP;
    QString userName;
    QTcpSocket *tcpSocket;
public slots:
    void slotEnter();
    void slotConnected();
    void slotDisconnected();
    void dataReceived();
    void slotSend();
};

#endif // TCPCLIENT_H
- tcpclient.cpp
#include "tcpclient.h"
#include <QMessageBox>
#include <QHostInfo>

TcpClient::TcpClient(QWidget *parent,Qt::WindowFlags f)
    : QDialog(parent,f)
{
    setWindowTitle(tr("TCP Client"));

    contentListWidget = new QListWidget;

    sendLineEdit = new QLineEdit;
    sendBtn = new QPushButton(tr("发送"));

    userNameLabel = new QLabel(tr("用户名:"));
    userNameLineEdit = new QLineEdit;

    serverIPLabel = new QLabel(tr("服务器地址:"));
    serverIPLineEdit = new QLineEdit;

    portLabel = new QLabel(tr("端口:"));
    portLineEdit = new QLineEdit;

    enterBtn= new QPushButton(tr("进入聊天室"));

    mainLayout = new QGridLayout(this);
    mainLayout->addWidget(contentListWidget,0,0,1,2);
    mainLayout->addWidget(sendLineEdit,1,0);
    mainLayout->addWidget(sendBtn,1,1);
    mainLayout->addWidget(userNameLabel,2,0);
    mainLayout->addWidget(userNameLineEdit,2,1);
    mainLayout->addWidget(serverIPLabel,3,0);
    mainLayout->addWidget(serverIPLineEdit,3,1);
    mainLayout->addWidget(portLabel,4,0);
    mainLayout->addWidget(portLineEdit,4,1);
    mainLayout->addWidget(enterBtn,5,0,1,2);

    status = false;

    port = 1234;
    portLineEdit->setText(QString::number(port));

    serverIP =new QHostAddress();

    connect(enterBtn,SIGNAL(clicked()),this,SLOT(slotEnter()));
    connect(sendBtn,SIGNAL(clicked()),this,SLOT(slotSend()));

    sendBtn->setEnabled(false);
}

TcpClient::~TcpClient()
{

}

void TcpClient::slotEnter()
{
    if(!status)
    {
        QString ip = serverIPLineEdit->text();
        if(!serverIP->setAddress(ip))
        {
            QMessageBox::information(this,tr("error"),tr("server ip address error!"));
            return;
        }

        if(userNameLineEdit->text()=="")
        {
            QMessageBox::information(this,tr("error"),tr("User name error!"));
            return;
        }

        userName=userNameLineEdit->text();

        tcpSocket = new QTcpSocket(this);
        connect(tcpSocket,SIGNAL(connected()),this,SLOT(slotConnected()));
        connect(tcpSocket,SIGNAL(disconnected()),this,SLOT(slotDisconnected()));
        connect(tcpSocket,SIGNAL(readyRead()),this,SLOT(dataReceived()));

        tcpSocket->connectToHost(*serverIP,port);

        status=true;
    }
    else
    {
        int length=0;
        QString msg=userName+tr(":Leave Chat Room");
        if((length=tcpSocket->write(msg.toLatin1(),msg.length()))!=msg. length())
        {
            return;
        }

        tcpSocket->disconnectFromHost();

        status=false;
    }
}

void TcpClient::slotConnected()
{
    sendBtn->setEnabled(true);
    enterBtn->setText(tr("离开"));

    int length=0;
    QString msg=userName+tr(":Enter Chat Room");
    if((length=tcpSocket->write(msg.toLatin1(),msg.length()))!=msg.length())
    {
        return;
    }
}

void TcpClient::slotSend()
{
    if(sendLineEdit->text()=="")
    {
        return ;
    }

    QString msg=userName+":"+sendLineEdit->text();

    tcpSocket->write(msg.toLatin1(),msg.length());
    sendLineEdit->clear();
}

void TcpClient::slotDisconnected()
{
    sendBtn->setEnabled(false);
    enterBtn->setText(tr("进入聊天室"));
}

void TcpClient::dataReceived()
{
    while(tcpSocket->bytesAvailable()>0)
    {
        QByteArray datagram;
        datagram.resize(tcpSocket->bytesAvailable());

        tcpSocket->read(datagram.data(),datagram.size());

        QString msg=datagram.data();
        contentListWidget->addItem(msg.left(datagram.size()));
    }
}
- main.cpp
#include "tcpclient.h"
#include <QApplication>

int main(int argc, char *argv[])
{
    QApplication a(argc, argv);
    TcpClient w;
    w.show();

    return a.exec();
}
( c )调试代码
运行后,chat_test项目同目录下生成build-TcpClient-Desktop-Debug文件夹: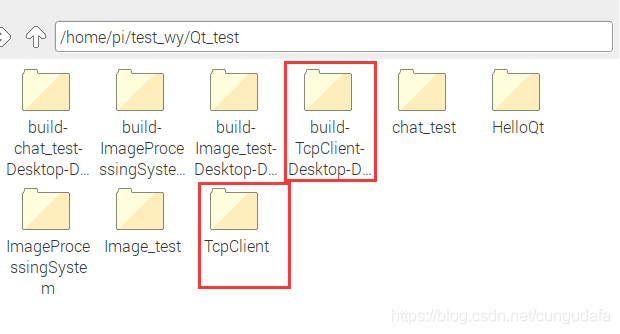
进入目录,点击运行TcpClient可执行文件: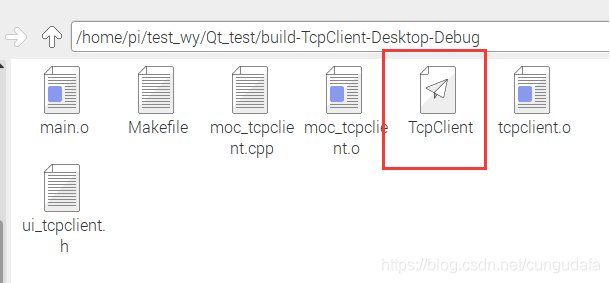

(3.2.2)server端与client端交互式聊天测试
运行server端(chat_test可执行文件),创建聊天室1234:
运行client端(tcpclient可执行文件),输入:
- 用户名
- 聊天室服务器地址:127.0.0.1 //本机测试
- 端口号(相同端口号即可聊天,如下图示:)
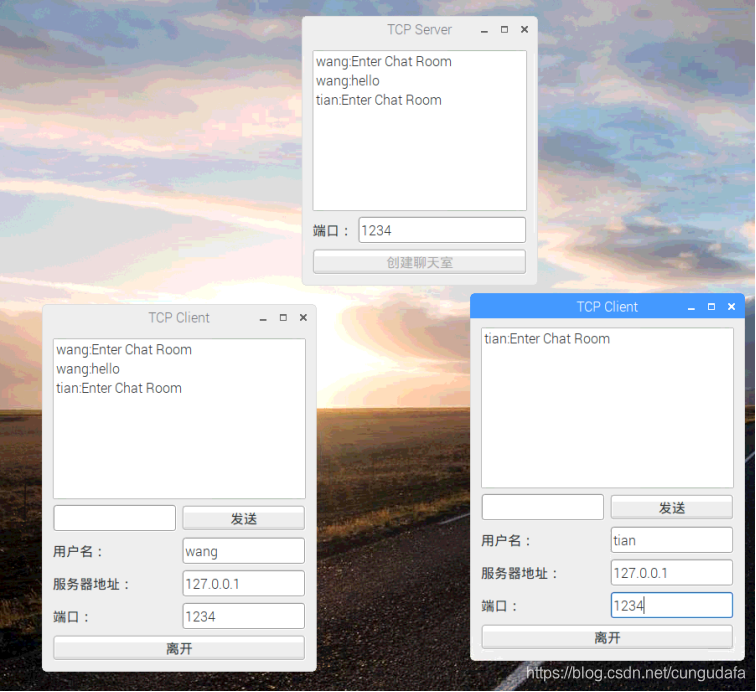
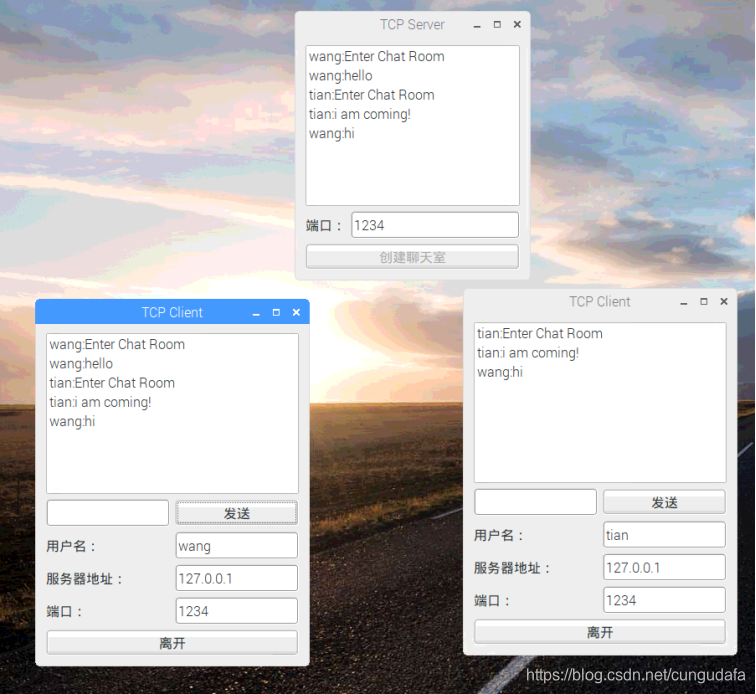
大功告成!

openvela 操作系统专为 AIoT 领域量身定制,以轻量化、标准兼容、安全性和高度可扩展性为核心特点。openvela 以其卓越的技术优势,已成为众多物联网设备和 AI 硬件的技术首选,涵盖了智能手表、运动手环、智能音箱、耳机、智能家居设备以及机器人等多个领域。
更多推荐


 1
1 0
0- 0


 已为社区贡献6条内容

所有评论(0)