
home assistant添加MQTT多实体设备的3种方式
本文介绍了在Home Assistant中添加MQTT设备的三种方法,重点分析了基于ESP32S3传感器的实现方式。第一种是通过configuration.yaml文件手动配置,详细说明了如何通过identifiers将多个实体绑定到同一设备;第二种是MQTT自动发现机制,设备端发送特定格式JSON到指定主题即可自动注册;第三种是通过HA网页界面图形化添加。文章特别比较了HA与传统IoT平台在设备
目录
1.在/homeassistant/configuration.yaml里添加设备
2.1 HA 的 mqtt server的配置里 启动发现(默认是启用的),并设置发现前缀,默认就是“homeassistant”
2.2 设备端 往 homeassistant开头的 topic上 发 官方规定的格式json,就可以添加设备了
介绍home assistant 里添加 mqtt设备的3种方式
基于ESP32s3的传感器采集,数据通过mqtt上传至home assistant
芯片官方有更简单的方法,如ESPHome,做好相关配置后,可以生成设备固件,在HA端也有对应的插件。也有arduino低代码方式编译生成固件。
本次使用IDF方式,c代码实现,会更灵活。
在配置HA mqtt添加设备时,看HA官方文档有点绕,最后还是调通了,记录一下。
通常的思维是,一个设备对应多个功能或属性,如温度采集、湿度采集、关闭屏幕等,
如下图移动的onenet,前端设备管理里先预制好设备对应的功能
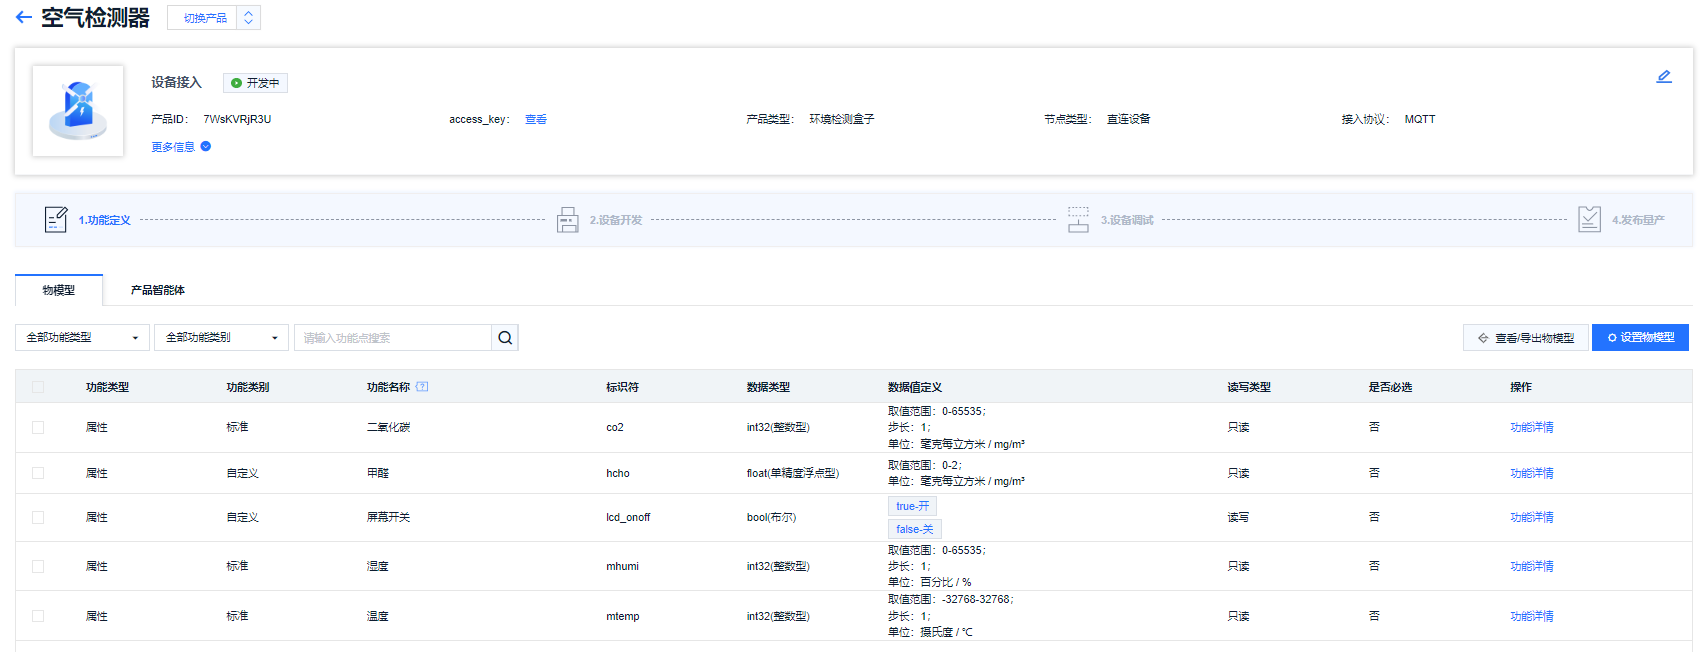
设备端,上报对应json即可,如下即是上图这个设备的功能对应的模型json:
{
  "properties": [
    {
      "identifier": "co2",
      "dataType": {
        "type": "int32"
      }
    },
    {
      "identifier": "hcho",
      "dataType": {
        "type": "float"
      }
    },
    {
      "identifier": "lcd_onoff",
      "dataType": {
        "type": "bool"
      }
    },
    {
      "identifier": "mhumi",
      "dataType": {
        "type": "int32"
      }
    },
    {
      "identifier": "mtemp",
      "dataType": {
        "type": "int32"
      }
    }
  ],
  "events": [],
  "services": [],
  "combs": []
}
带着这个思维,去HA上整,就整不出来了....
HA上添加mqtt设备,官方给出的有3种方式:
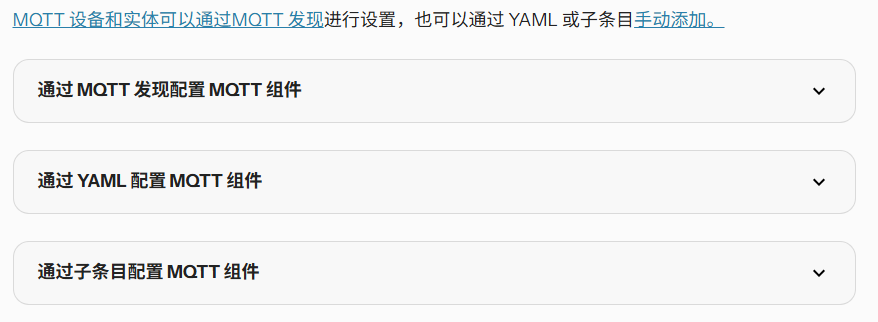
1.在/homeassistant/configuration.yaml里添加设备
HA的逻辑是,先添加组件(算是一个功能分类,上述链接里有描述,涵盖面还是还叫全的),如
传感器Sensor。然后在Sensor下添加功能(温度、湿度等)和设备信息,设备信息里identifiers很关键,多个功能( ` HA web页面里叫实体 `)是通过同一个identifiers绑定到同一个device上,Sensor、button等组件下的功能都可以通过同一个device上,这样一个设备就具有多个功能实体了。
可以看出,HA对 device的概念跟传统意义上不太一样,更像是一个逻辑集合,不那么看重device本身,更着重于各个实体,理论上可以把两台esp32设备的温度都绑定到HA里的同一个device上。 对设备的管理,HA给的有接口,可以自建单独的设备管理,官方文档有个 configuration_url 可以用

mqtt:
  sensor:
    - name: "甲醛"
      state_topic: "homeassistant/sensor/hcho/state"
      device_class: "volatile_organic_compounds"
      unit_of_measurement: "mg/m³"
      value_template: "{{ value_json.hcho / 1000}}"
      unique_id: "hcho20250724001"
      device:
        name: "ESP8266-hcho"
        suggested_area: "yadiroom"
        manufacturer: "yadi company"
        model: "E103-W01"
        model_id: "ESP8266EX"
        serial_number: "sn000001"
        hw_version: "v1.0.1"
        sw_version: "1.0.1"
        identifiers:
          - "esp8266_hcho01"

    # ESP32S3 空气质量检测设备传感器
    - name: "二氧化碳"
      state_topic: "homeassistant/airtesting/state"
      device_class: "carbon_dioxide"
      unit_of_measurement: "ppm"
      value_template: "{{ value_json.co2}}"
      unique_id: "co2_esp32s3"
      device:
        name: "esp32s3-AirTesting"
        suggested_area: "yadiroom"
        manufacturer: "yadi company"
        model: "ESP32S3-Air01"
        model_id: "m001"
        serial_number: "s3air0001"
        hw_version: "v1.0.1"
        sw_version: "v1.0.1"
        identifiers:
          - "es32s3-air-01"

    - name: "甲醛"
      state_topic: "homeassistant/airtesting/state"
      device_class: "volatile_organic_compounds"
      unit_of_measurement: "mg/m³"
      value_template: "{{ value_json.hcho}}"
      unique_id: "hcho_esp32s3"
      device:
        identifiers:
          - "es32s3-air-01"

    - name: "温度(SCD30)"
      state_topic: "homeassistant/airtesting/state"
      device_class: "temperature"
      unit_of_measurement: "°C"
      value_template: "{{ value_json.mtemp}}"
      unique_id: "mtemp_scd30_esp32s3"
      device:
        identifiers:
          - "es32s3-air-01"

    - name: "温度(esp32-BOARD)"
      state_topic: "homeassistant/airtesting/state"
      device_class: "temperature"
      unit_of_measurement: "°C"
      value_template: "{{ value_json.boardtemp}}"
      unique_id: "mtemp_board_esp32s3"
      device:
        identifiers:
          - "es32s3-air-01"

    - name: "湿度"
      state_topic: "homeassistant/airtesting/state"
      device_class: "humidity"
      unit_of_measurement: "%"
      value_template: "{{ value_json.mhumi}}"
      unique_id: "mhumi_esp32s3"
      device:
        identifiers:
          - "es32s3-air-01"

    - name: "版本号"
      state_topic: "homeassistant/airtesting/state"
      value_template: "{{ value_json.swv}}"
      unique_id: "hwvesp32s3"
      device:
        identifiers:
          - "es32s3-air-01"

  update:
    # ESP32S3 固件升级
    - name: "升级"
      title: "Device Firmware"
      unique_id: "update_software_esp32s3"
      command_topic: "homeassistant/airtesting/set"
      payload_install: "install"
      state_topic: "homeassistant/airtesting/state"
      #value_template: "{{ value_json.update_state }}"
      value_template: "{{ {'installed_version': value_json.installed_ver, 'latest_version': value_json.new_ver } | to_json }}"
      device_class: "firmware"
      device:
        name: "esp32s3-AirTesting"
        identifiers:
          - "es32s3-air-01"

  switch:
    # ESP32S3 屏幕开关
    - name: "屏幕开关"
      unique_id: "lcd_onoff_esp32s3"
      state_topic: "homeassistant/airtesting/state"
      command_topic: "homeassistant/airtesting/set"
      payload_on: '{"lcd_onoff":1}'
      payload_off: '{"lcd_onoff":0}'
      state_on: "1"
      state_off: "0"
      value_template: "{{ value_json.lcd_onoff }}"
      device:
        name: "esp32s3-AirTesting"
        identifiers:
          - "es32s3-air-01"

  button:
    # ESP32S3 测试按钮
    - name: "测试按钮"
      unique_id: "btn_test_esp32s3"
      command_topic: "homeassistant/airtesting/set"
      payload_press: "test_btn"
      entity_category: "config"
      device:
        name: "esp32s3-AirTesting"
        identifiers:
          - "es32s3-air-01"
上述代码里有两个设备,使用了两个topic,一个上行一个下线,ota通知那个应该单独一个topic更好。
这种自己编写YAML的方式添加设备,
command_topic和state_topic:可以自己定义,如 testdevice/xxx/....
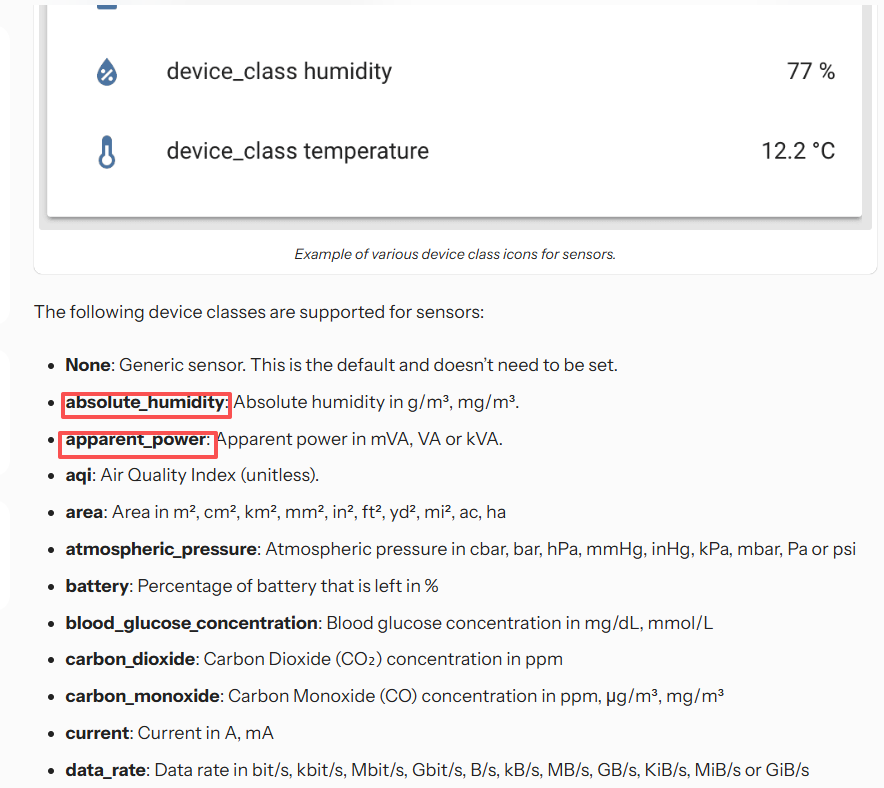
device_class:是这实体的样式,可以不要这个字段,它会使用默认的,如果有这个字段的化,一定要用官方现有的,否则会报错。可以去对应组件里找,比如sensor里的样式,温度、湿度、电池电量等,链接:https://www.home-assistant.io/integrations/sensor/#device-class
unit_of_measurement:数据的单位,官方也给了一些参考,可以用也可以自定义
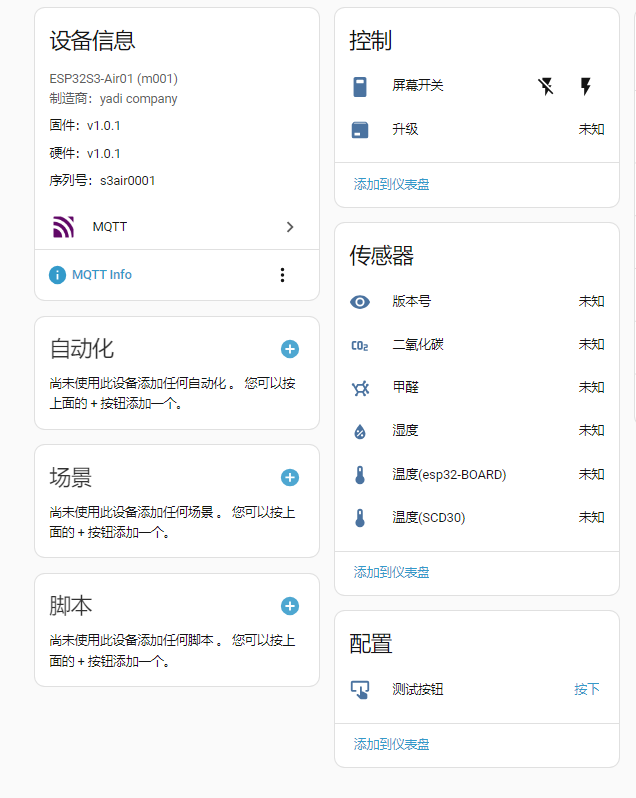
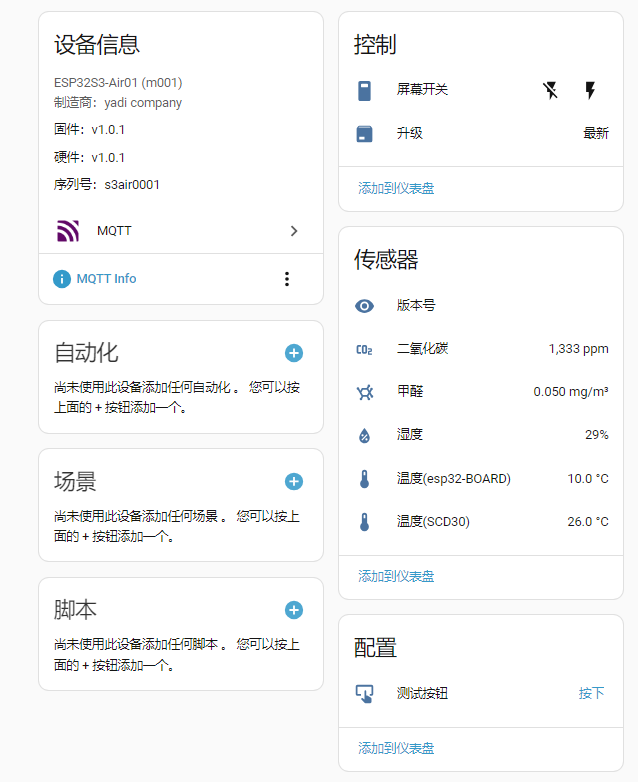
[开发者选择->yaml配置->检查配置],如果配置没问题,点重启,就可以看到添加的设备了,如下图:
使用 MQTTX客户端 测试,发送JSON,就可以上报数据了
Topic: homeassistant/airtesting/stateQoS: 0

{
	"lcd_onoff":1,
	"hcho":0.07,
	"co2":1230,
	"mtemp":23,
	"mhumi":55,
	"installed_ver":"v1.0.1",
	"new_ver":"v1.0.1",
	"swv":"v1.0.1",
	"boardtemp":26
}
web上显示的效果:
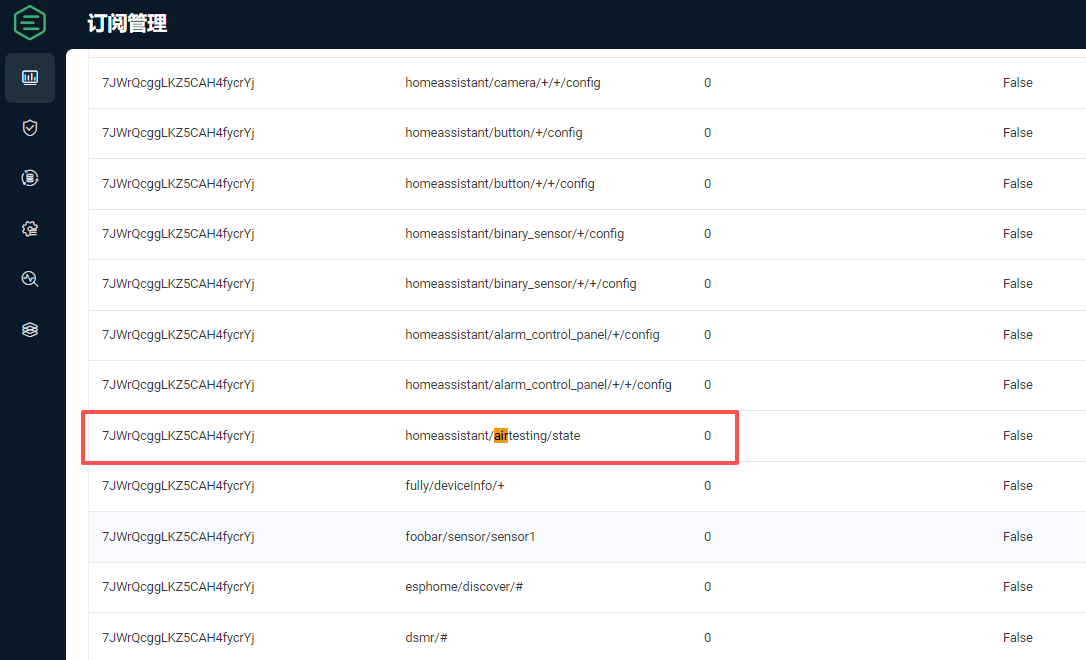
我的HA里的mqtt server使用的是EMQX插件,它有个mqtt管理页面,当配置完yaml并重启后,可以看出,HA订阅了 yaml里的topic:
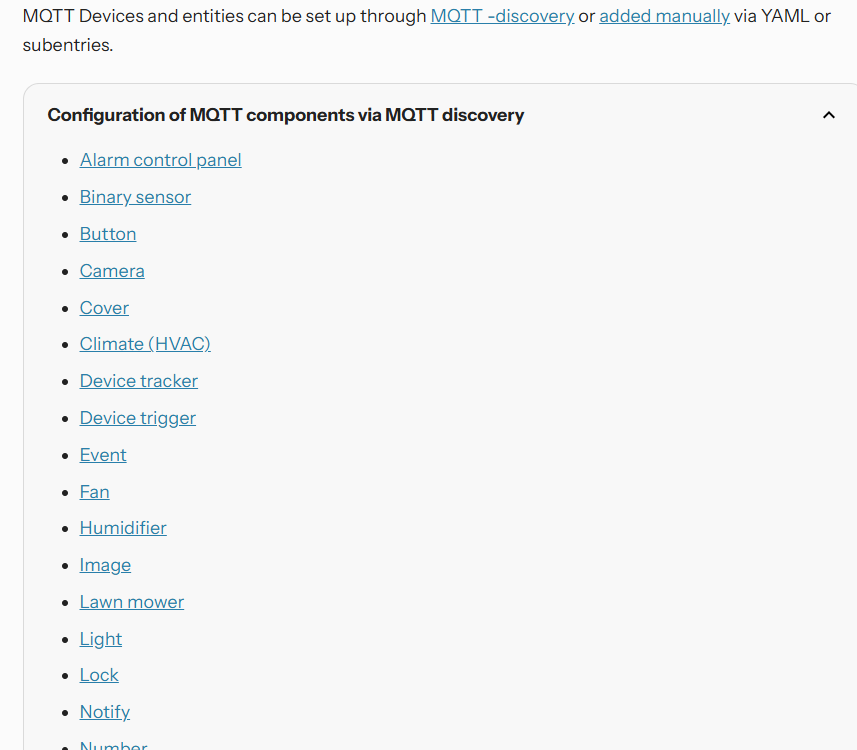
还有其他的一堆 topic,大概六七十个,是在 emqx 插件配置完成并启动后,HA自动订阅的组件,如下图:
2. HA自动发现的方式添加设备
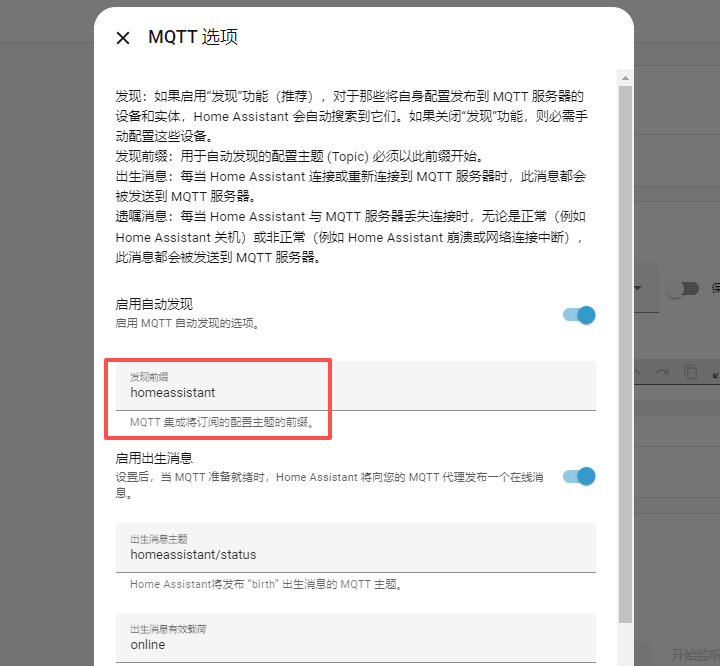
2.1 HA 的 mqtt server的配置里 启动发现(默认是启用的),并设置发现前缀,默认就是“homeassistant”
2.2 设备端 往 homeassistant开头的 topic上 发 官方规定的格式json,就可以添加设备了
官方介绍:https://www.home-assistant.io/integrations/mqtt/#mqtt-discovery
The discovery topic needs to follow a specific format:
<discovery_prefix>/<component>/[<node_id>/]<object_id>/config<discovery_prefix>: The Discovery Prefix defaults tohomeassistantand this prefix can be changed.<component>: One of the supported MQTT integrations, e.g.,binary_sensor, ordevicein case of device discovery.<node_id>: (Optional): ID of the node providing the topic, this is not used by Home Assistant but may be used to structure the MQTT topic. The ID of the node must only consist of characters from the character class[a-zA-Z0-9_-](alphanumerics, underscore and hyphen).<object_id>: The ID of the device. This allows for separate topics for each device. The ID of the device must only consist of characters from the character class[a-zA-Z0-9_-](alphanumerics, underscore and hyphen).
可以看出,这个 component 必须要使用HA已支持的,可以去EMQX 的后台看看 HA 都订阅了哪些topic,
以下面这个举例
homeassistant/device/+/+/config
// + 可以替换成私有的
使用MQTTX 发布 JSON
Topic: homeassistant/device/hello_100101/m30031/configQoS: 0

{
  "dev": {
    "identifiers": "my_test_hello",
    "name": "hello",
    "manufacturer": "heihei",
    "model": "xya",
    "sw": "1.0",
    "sn": "aso000001",
    "hw": "1.0rev2"
  },
  "o": {
    "name":"testdis",
    "sw": "2.1"
  },
  "cmps": {
    "some_unique_component_id1": {
      "p": "sensor",
      "device_class":"temperature",
      "unit_of_measurement":"°C",
      "value_template":"{{ value_json.temperature}}",
      "unique_id":"temp01ae_t"
    },
    "some_unique_id2": {
      "p": "sensor",
      "device_class":"humidity",
      "unit_of_measurement":"%",
      "value_template":"{{ value_json.humidity}}",
      "unique_id":"temp01ae_h"
    }
  },
  "state_topic":"sensorBedroom/state"
}
显示效果:
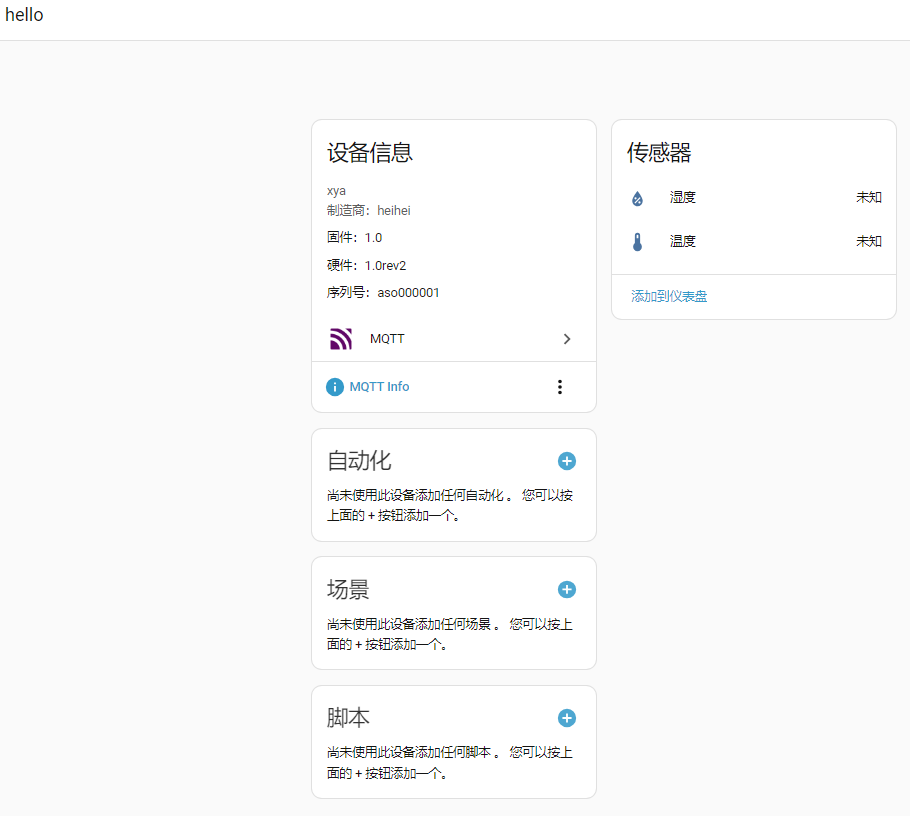
3. HA web页面图形化添加

在添加的过程种, 只能添加一个实体,如果有多个实体,等添加完成后再已有的基础上继续添加
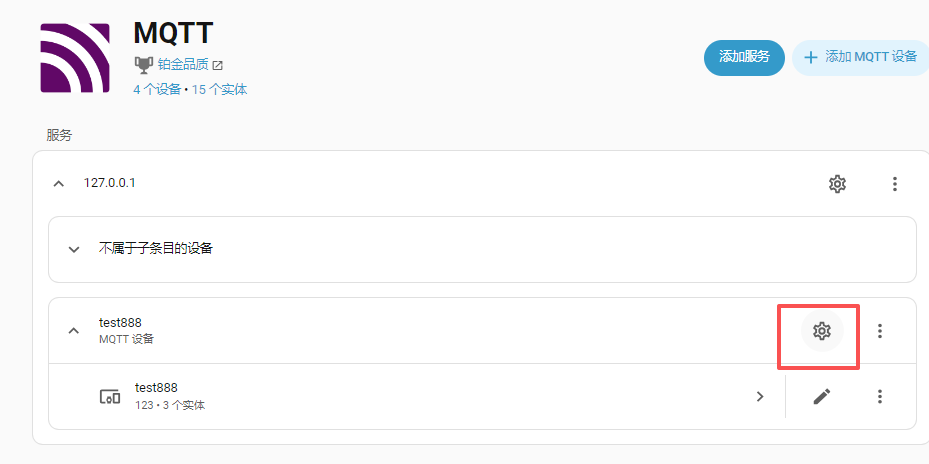
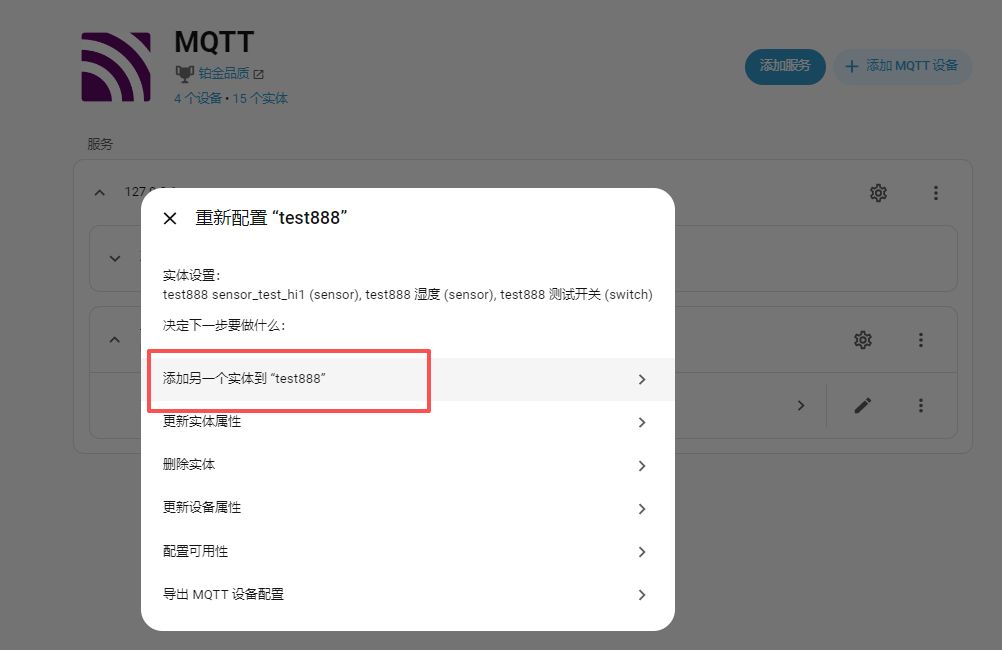
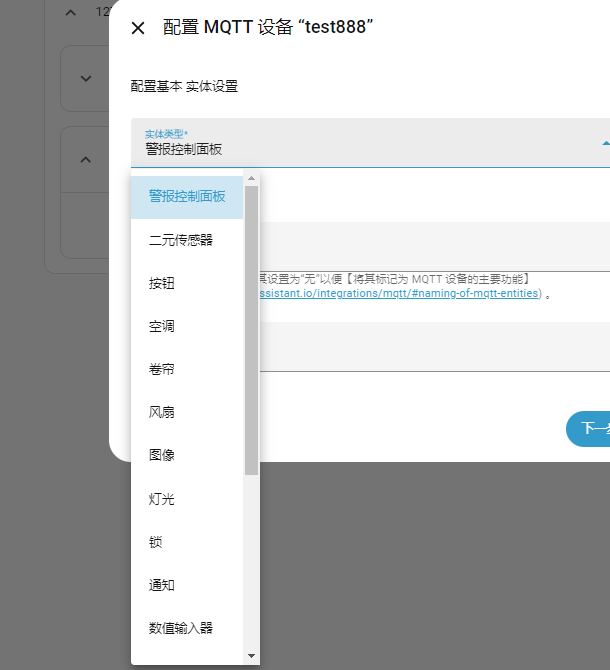
这里就可以选择要添加的设备类别,如 传感器、按钮、开关等,概念跟第 1 章一样。

openvela 操作系统专为 AIoT 领域量身定制,以轻量化、标准兼容、安全性和高度可扩展性为核心特点。openvela 以其卓越的技术优势,已成为众多物联网设备和 AI 硬件的技术首选,涵盖了智能手表、运动手环、智能音箱、耳机、智能家居设备以及机器人等多个领域。
更多推荐

 13
13 0
0- 0


 已为社区贡献1条内容

所有评论(0)